The painters were top notch. They worked very efficiently, courteously and extremely cleanly.
- Jack Bernauer, Inverness
Phone: (847)934-8885 | Email: info@paintpartner.com Visit PIP's Facebook Page View Mario Guertin's LinkedIn Profile Visit PaintPartner's Google+ Page Follow PaintPartner on Twitter Visit PIP's Pinterest Page Visit PIP's Houzz Page Subscribe to PaintPartner's RSS Feed

The History of Paint in America: Transiting from “Ingredient Mixing” to Paint in a Can

When thinking of painting, one automatically thinks of ready-mixed paint in cans. However, the advent of the paint can is a fairly recent phenomenon. For centuries and going back into antiquity, painters were “ingredient mixers”, as well as applicators. There was no such a thing as ready-mixed paints. Painters mixed their paints as they went along. Whoever knew the formulas had a high level of “job security” in those days!

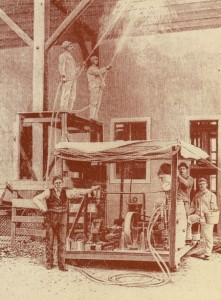
First Spray Painting Machine in America, Chicago, Circa 1892

It was not until 1867 that the first US patent was issued for a read-mixed paint. The ingredients listed in the patent were as follows: oxide of zinc, acetate of lead, sulfate of zinc, silicate of soda diluted in water, lime water and linseed. This list of ingredients may help to explain why, for the better part of the following twenty years, ready-mixed paints had a serious image problem. They were considered to be inferior and undependable.

Then, what is it that caused the balance to tilt in favor of the ready-mixed paints? A few key factors contributed to that outcome. First, the American Industrial Revolution took root during the 1870’s and 1880’s. During that same period, there was also tremendous population growth, fueled by a considerable influx of immigrants. As an example, Chicago’s population grew from 298,000 in 1870 to 1.7 million in 1900. These two forces collided to create the perfect storm for something else to emerge as the painting industry’s driving force: the chemist and paint lab. As the industrial revolution progressed, the needs for painting surfaces became more and more complex and the demand for paints began to outstrip painter’s ability to mix the ingredients. The paint can was born to stay.

As a house painting contractor from the Chicago area, I have always been fascinated by paint memorabilia and the history of the painting industry. I not only have a considerable memorabilia collection, but I also give lectures to interior designers, architects and other interested groups on the History of Paint in America.

Wood Toning is a Great Way to Erase Years of Wear on Woodwork

When refinishing stained woodwork, stripping the old finish and starting over is very time-consuming and expensive process. The good news is that, in most cases, stripping is not necessary in order to rejuvenate your existing woodwork and make it look like new again.

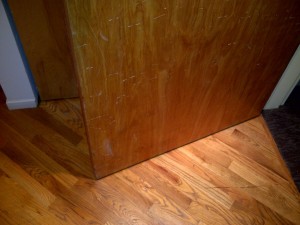
Toned and Re-Varnished door - Before

As house painting contractors, based out of the Northwest suburbs of Chicago, we regularly get called on to rescue the stained woodwork in clients’ homes. After living in a house for over twenty and raising a family, the woodwork often gets a look worn out! Doors and door casings seem to show the most wear – a problem sometime compounded by pets, as shown in the attached picture. Surfaces, like these, that show nicks, scuffs and wear patterns, can be brought back to life by first cleaning the surfaces to remove the dirt, dust and oily residue that have accumulated over time. We then use a gel stain to add a very thin veil of color to the existing woodwork. That stain penetrates and hides all the unsightly blemishes and makes the wood look fresh again. We call this step “toning” the woodwork. Lastly, we re-varnish those surfaces.

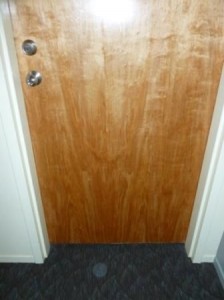
Toned and Re-Varnished door - After

We also regularly encounter situations where the finish on the interior bottom rails and sills of the windows breaks down due to effect of the sun and moisture condensation. In many situations, the finish is completely gone and the wood may even show water stains. For some reason, we encounter this problem almost exclusively with casement windows. In a situation like this, before toning the wood, we first sand the damaged areas bare and then stain them with a matching color. After the stain application is dry, we proceed with the toning procedure.

The second picture shows the completed wood refinishing project, after the toning and varnishing have taken place.

Restoring a Forty–Year Old, Gold-Glittered Popcorn Ceiling

Popcorn ceilings are a type of decorative finish that became very popular in the 1950’s and remained in fashion through the 70’s. It consisted of a sprayed application of paint, combined with a lumpy aggregate. Glitter was sometime injected into the wet paint for an additional decorative effect. Silver was most popular, followed by gold and clear glitter. A common popcorn aggregate was asbestos, which eventually caused the demise of popcorn ceilings when it was banned for use in construction materials in 1977. Even though other aggregates like polystyrene and Styrofoam existed, other issues like poor clean ability and the need for artful repair caused this decorative finish to fall out of fashion; however, not for everyone!

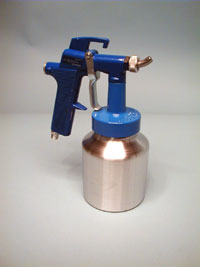
Ceiling Glitter Gun for Popcorn Ceilings

As house painting contractors and decorative painting specialists, we are sometime called on to restore older decorative finishes. A new client from the far Northwest suburbs of Chicago recently made such a request. He has a gold-glittered popcorn ceiling on a high ceiling in his living room. The finish is over forty years old and he has enjoyed it for all the twenty years he has lived there. An unsightly water stain appeared on the ceiling before he had the roof replaced, which prompted him to seek to have his ceiling restored; gold glitter included!

After speaking to my colleagues Joel Hamberg from Oregon and Mark Coley of Connecticut, as well doing a couple of hours of research on Google, I was able to gather all the information I needed to tackle this ceiling restoration, which will take place in February. The most challenging part of the research was to find a manufacturer that still made glitter guns. The first one I found was a hand-operated version. However, it turned out that although still displayed on the web, the manufacturer had stopped making it. Determined to find one, I finally stumbled across a pneumatic version on page twenty-one of my Google search; and it is a beauty! It is operated in conjunction with a compressor and comes equipped with two different ceramic tips. It arrived yesterday with the gold glitter I need. Wow, I am ready to go!

Writing is Like Painting with Words

I am a painting contractor in the Chicago area and one of the gifts I get to exercise in my life is writing. In the last several years, I have written about twenty articles in the field of management, craftsmanship and field operations. In the last two years, I have also written nearly one hundred, 300-word blog posts on topics largely related to house painting and paint restoration.

Opening the Door to Writing

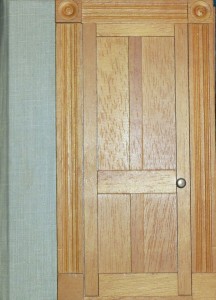
I did not always write. Like many people, I wrote when I had to, but I did not feel particularly drawn to writing. However, about seven years ago, something shifted in me about writing. I came across this small notebook, with all white pages. On the cover was a panel door with an ornate fluted casing and a door handle. The door was made of carefully assembled wood pieces and glued onto a wood book cover. I remember being mesmerized by that notebook and felt compelled to buy it and mount it on the inspiration wall, in my office. I remember telling a friend, at the time, that this book was an inspiration for me to open the door to writing, in my life.

At the time, I could not see how I could make time for writing. However, it did not take more than a year before I began to write. Writing is now an ongoing part of what I do and I find it enormously satisfying. To me, writing is very much like painting a canvas. At first, there is just a blank space and an idea or vision that only lives in my mind at the moment. As words are added to the paper, a picture begins to emerge, that makes real what was only an idea a moment ago. Those words, when artfully put together, have the power to inspire, empower and create a permanent change in the reader’s perception of life and its possibilities. Writing is painting with words!

Not Just a Great Looking Paint Job, but One that Lasts!

Surface Preparation

On a historical paint restoration project, the customer expects not only a great looking paint job, but one that will last a long time as well, because of the considerable costs involved. There are several factors that contribute to the higher cost of a paint restoration project.

First, such projects often require an extensive level of surface preparation because of the poor condition of the old coatings. These surfaces have often not been painted in fifteen or twenty years, or even longer. Consequently, surfaces will likely require epoxy restoration and even the reproduction of custom moldings or ornamentation.

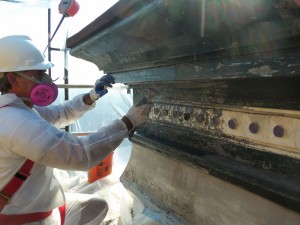
Second, historical restoration almost automatically requires compliance to RRP rules to protect everyone and the environment from exposure to lead paint dust. That means additional containment steps and costs.

Scaffolding

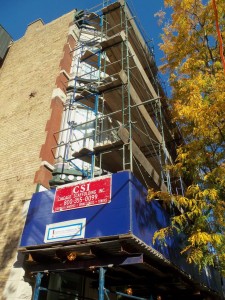
Finally, old buildings in a big city like Chicago, are often situated right next or close to the sidewalk and very close to the neighbors. Consequently, gaining access to the surfaces to be worked on can also require the renting of special equipment like a canopy, scaffolding, boom and the procurement of all the required permits.

On a recent paint restoration project, the rental and permit costs alone exceeded $10,000. If you are the owner of such a building, how long would you like the paint job to last? I would say as long as possible! This means that, as a house painting contractor, I must ensure that our surface preparation is as thorough as possible. Additionally, the primers we use must be the best suited for every surface we work on. For example, we recently used an alkyd, high-solid, direct-to-metal primer to give a full prime coat to 120-year old tin cladding. On old wood moldings, where the old paint had mostly been removed, we used a two-part clear epoxy sealer to prime those surfaces. The goal of each phase of our work is: the longevity of the paint job!