I would have any of his people over at my house for dinner!
- Lois Gries, ASID, Chicago
Phone: (847)934-8885 | Email: info@paintpartner.com Visit PIP's Facebook Page View Mario Guertin's LinkedIn Profile Visit PaintPartner's Google+ Page Follow PaintPartner on Twitter Visit PIP's Pinterest Page Visit PIP's Houzz Page Subscribe to PaintPartner's RSS Feed

Archive for February 2012

A Palladium-Leafed Ceiling – A Fitting Story for my Blog Post #100

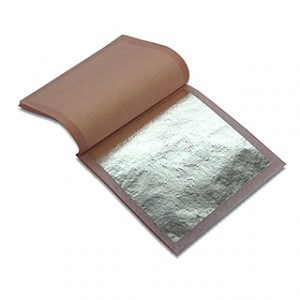
Palladium Book of Leaves

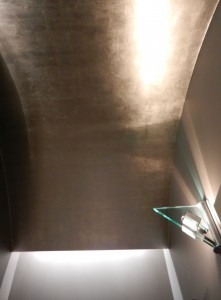
Platinum Gilded Ceiling

Gilding is one of our specialties as painting and decorating contractors in the Chicago area. It consists in the laying of super thin, square leaves of metal over a tacky varnish. Precious metals and composition metals can be successfully used for the gilding of surfaces.

To this day, our most interesting gilding project had been the decoration of an ornate sarcophagus intended to be used by an Italian club, as part of an annual festival to celebrate a beloved Saint from their native town in Sicily. White gold (12 karat gold) was used for that project.

We were recently hired for a gilding project that rivals our sarcophagus project in scope. This project consists in the gilding of an architectural, curved ceiling, in a high-style powder room, using palladium leaf. Palladium is in the family of platinum, one of the precious metals. It is the least dense of the platinum elements and is therefore best suited for leafing purposes. It also rivals the cost of gold in dearness.

Palladium has a soft silver color. However, contrary to silver or white gold (which is a combination of gold and silver), palladium does not tarnish and therefore doe not need to be sealed-coated. Only pure gold leaf can make that claim. As a result, palladium has a beautifully soft metallic look.

The attached picture shows the final look of the palladium ceiling. Our client wanted the look of silver, with its soft reflectivity for the different light sources in the room. She was thrilled!

Craftsman Tips for Painting Speaker Covers

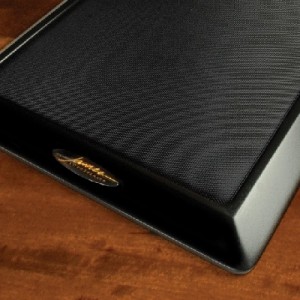
Painted Speaker Cover

Painting parts of the electronic systems, in home and office environments, present special challenges to the interior painting craftsman. In the past week, I had the pleasure of meeting John Baumeister of Tech Tonic at a networking function. As a technology consultant to owners of buildings, John takes his work very seriously. At some point in the conversation, John voiced that one of his pet peeves has to do with mistakes painters often make when painting speaker covers. He queried me regarding the methodology our painters follow when painting speaker covers. I thought I would pass along the information I shared with John.

Our painting experience has been gained over more than twenty years of operation as painting contractors in the Chicago area. First of all, I recommend that the speakers be installed where they belong, prior to any painting, so as to prevent unavoidable touchups. When it is a new installation, we also recommend that the installer leaves off the speaker covers and instead uses the plastic covers supplied by the manufacturer, in order to prevent damage or dust contamination by other trades. For new installations, we also recommend that the installer tags the speaker covers to identify the room and surface they will be mounted on. The installer should also request a signature from the painting contractor (or the owner) when he/she takes possession of the covers. That form should list the covers, quantities and nature of the covers. The use of such a form will limit the opportunity for loss or miscommunication.

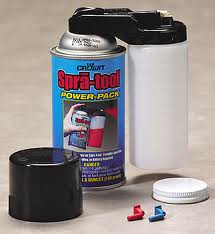
Spray Tool for Painting Speaker Covers

What about the painting? Covers will sometime have a liner acoustical fabric on their backside. That fabric should be removed and protected for reinstallation after the painting is completed. The most affective way we have found to paint speaker covers is a simple hand-held spray system called Spra-Tool. It comes with a propellant cartridge, a plastic jar to hold the paint and a connection to bring the propellant to the jar. The paint may have to be thinned ten percent and three thin coats may be required to avoid clogging holes. For darker colors, we recommend to first prime the covers with a bonding primer to ensure good paint adhesion. After the paint has cured, the plastic cover is removed and the custom-painted covers can be installed, for a factory-painted look!