Superior skills; a different approach to serving the client; all about delivering excellence in a professional, communicative manner.
- Doug Morrison, Arlington Heights
Phone: (847)934-8885 | Email: info@paintpartner.com Visit PIP's Facebook Page View Mario Guertin's LinkedIn Profile Visit PaintPartner's Google+ Page Follow PaintPartner on Twitter Visit PIP's Pinterest Page Visit PIP's Houzz Page Subscribe to PaintPartner's RSS Feed

Archive for Interior Painting

Watch Out for Old Calcimine Paint on the Ceilings of your Old House

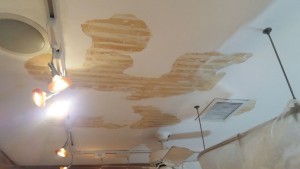
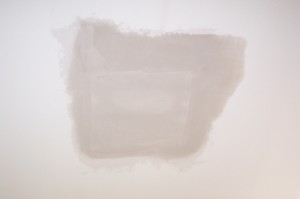
Scraped Layers of Paint from the Original Calcimine Coating

Scraped Layers of Paint from the Original Calcimine Coating

As painting and Decorating Contractors in the Chicago area, we were recently, asked to repair five ceilings that were originally painted with calcimine. The problem with calcimine is that, after many years, all the layers of paint on top of it begin to peel off. The peeling areas may only be six to eight inches across, but once you start scraping the flaking paint, you may end up with several square feet of scraped surfaces, as shown in the attached picture.

Calcimine was widely used in the nineteenth century and the first third of the twentieth century as an inexpensive way to give a clean and flat sheen to plastered surfaces. It was made of glue, chalk (or zinc oxide) water and coloring. The glue in calcimine made it quite vulnerable to environmental moisture or water leaks. This is why you must avoid reintroducing water on the painted surfaces.

Thoroughly scraping the affected areas is key. Once scraped, the peeled areas with an oil primer to avoid reactivating the calcimine. The scraped areas are then repaired with joint compound to make the surface smooth again. Finally, our product of choice for a basecoat is a flat oil paint specifically formulated to recoat old calcimine surfaces.

The care of an old house involves many quirky aspects like calcimine. Having the knowledge to understand how to take care of those matters is why we exist.

When a Foot Goes Through the Attic Floor, Be Careful whom you Ask to Do the Repairs

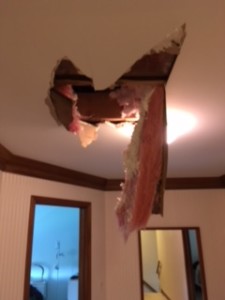
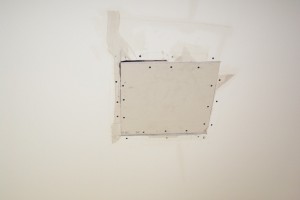
Hole in Ceiling Below Attic

Hole in Ceiling Below Attic

As painting contractors in the Chicago area, we are asked to perform some unusual tasks, like our story will tell. Recently, we were asked by a customer to correct the bad patching someone had done on a ceiling. Bad it was!

The story goes that the client asked a roofer to go check something in the attic. She suddenly heard this big noise in her upper hall. She ran upstairs to find a large hole in the ceiling and a leg sticking out of the hole – ouch! The contractor said: “I can fix it” – that was the second mistake! The drywall went in OK, but the taping and patching were horrible. The client was embarrassed and very unhappy with the repair work.

What we had to do was to remove all the Joint tape and joint compound that had been applied and start over again. The client’s comment after we got done: “This is how it was supposed to look the first time”. Now, the client knows whom to call for flawless drywall repair. Lesson well learned!

Bad Taping Work

Bad Taping Work

Flawless Taping

Flawless Taping

Repairing Holes in Drywall after the Electrician Leaves – Making it Look Like it Never Happened!

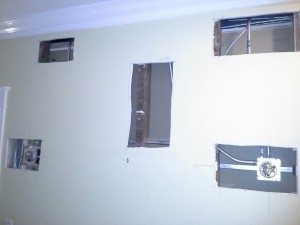
Holes in Drywall

Making holes in drywall disappear, as if they never existed, is one of the skills of a competent house painter. As painting and decorating contractors in the Chicago area, we are often called upon to do such repairs after an electrician has added electrical boxes or fixtures to an existing house. This is also a common occurrence when a house is being rewired.

The first picture shows how one of the walls looked when we first came on the premises of a recent project. On that particular project, there were sixteen holes that varied in size from ten square inches to three square feet. Our record is twenty-four holes in the plaster walls of three rooms – ouch! I think the electrician was a bit Sawzall-happy.

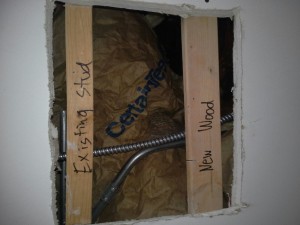
Wood bracing for Drywall Patch

How do you go about disappearing a hole in drywall? A drywall patch must be screwed to wood bracing. On occasion, there is a stud nearby that can provide bracing for at least one side of the patch. More commonly, we need to cut pieces of 2×1 wood and screw them to the rear of the existing drywall to create the bracing we need, as shown in the next picture. Sometime, we may need to enlarge the hole or combine it with other holes to make the repairs more efficient. We use our professional judgment to make those calls.

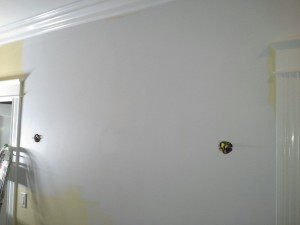
Repaired Five Holes in Drywall

At this point, it is important to ascertain the thickness of the surrounding drywall. In modern construction, walls are clad in 5/8” and ceilings in ½” drywall (but not always). If you have to, you are better off using a thinner piece that a thicker one, as it can be filled in with joint compound. The new drywall piece is then screwed to the wood bracing, taped and patched. A top quality repair will generally require three coats of joint compound and easily cover an area three or four times the original size of the hole. The patch is then ready to be primed. By then, the hole has disappeared!

Repairing holes in drywall is part of the skill-set of a competent house painter. Making it look as if it never happened is the result our clients can expect from us.

Drywall Repairs: Holes Can Be Disappeared

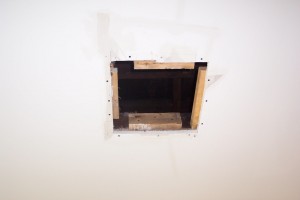
Drywall Hole Repair 1

Drywall Hole Repair 2

Drywall Hole Repair 3

As house painting contractors in the Chicago area, we often have to do significant repairs to drywall surfaces before tackling an interior painting project. The most common reasons that cause holes in the drywall are as follows. First, electricians and plumbers are known to make exploratory holes, or to open walls in order to install new pipes, conduits and electrical boxes. Rarely do they dare to tackle the delicate job of repairing the drywall (thank God!). Also, water damaged drywall, needs to be cut out and therefore leaves gaping holes as well. Over-active teenagers can also on occasion cause drywall damage – I will not mention the many ways this can happen.

How do you professionally repair holes in drywall? First, we square off the hole to a workable size. If the hole is relatively small, from 12 to 15 inch in length, we will create bracing on the sides of the hole by screwing pieces of 2×1 lumber to the edges of the hole. For smaller holes, two braces will suffice. For holes from 4 to 6 inch in diameter, we often use a ready-made patch, made of a light-weight perforated metal and fiberglass mesh. For larger holes, we will attempt to use the studs as part our bracing. In those cases, we still have to use bracing between the studs, on the ends of the opening.

The next step is to cut a piece of drywall, of the same thickness, to fit the opening. We then screw it to the wood braces to secure it in place. We then tape the joints with paper tape and apply two or three coats of joint compound. After properly sanding the area, we spot prime the patched area and repaint the wall or ceiling. The drywall whole has now disappeared! The drywall repair is complete!

Craftsman Tips for Painting Speaker Covers

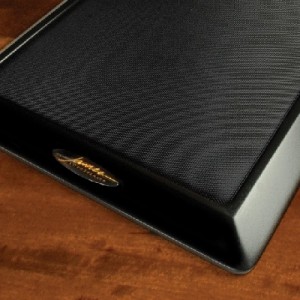
Painted Speaker Cover

Painting parts of the electronic systems, in home and office environments, present special challenges to the interior painting craftsman. In the past week, I had the pleasure of meeting John Baumeister of Tech Tonic at a networking function. As a technology consultant to owners of buildings, John takes his work very seriously. At some point in the conversation, John voiced that one of his pet peeves has to do with mistakes painters often make when painting speaker covers. He queried me regarding the methodology our painters follow when painting speaker covers. I thought I would pass along the information I shared with John.

Our painting experience has been gained over more than twenty years of operation as painting contractors in the Chicago area. First of all, I recommend that the speakers be installed where they belong, prior to any painting, so as to prevent unavoidable touchups. When it is a new installation, we also recommend that the installer leaves off the speaker covers and instead uses the plastic covers supplied by the manufacturer, in order to prevent damage or dust contamination by other trades. For new installations, we also recommend that the installer tags the speaker covers to identify the room and surface they will be mounted on. The installer should also request a signature from the painting contractor (or the owner) when he/she takes possession of the covers. That form should list the covers, quantities and nature of the covers. The use of such a form will limit the opportunity for loss or miscommunication.

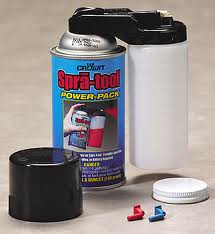
Spray Tool for Painting Speaker Covers

What about the painting? Covers will sometime have a liner acoustical fabric on their backside. That fabric should be removed and protected for reinstallation after the painting is completed. The most affective way we have found to paint speaker covers is a simple hand-held spray system called Spra-Tool. It comes with a propellant cartridge, a plastic jar to hold the paint and a connection to bring the propellant to the jar. The paint may have to be thinned ten percent and three thin coats may be required to avoid clogging holes. For darker colors, we recommend to first prime the covers with a bonding primer to ensure good paint adhesion. After the paint has cured, the plastic cover is removed and the custom-painted covers can be installed, for a factory-painted look!