The walls are far too beautiful, and anything that hopes for a place in front of our walls will have to prove its worth first.
- Richard Medina, Palatine
Phone: (847)934-8885 | Email: info@paintpartner.com Visit PIP's Facebook Page View Mario Guertin's LinkedIn Profile Visit PaintPartner's Google+ Page Follow PaintPartner on Twitter Visit PIP's Pinterest Page Visit PIP's Houzz Page Subscribe to PaintPartner's RSS Feed

Archive for Wood Finishing

Matching Wood Finishes Tests the Skills of the Best Craftsmen

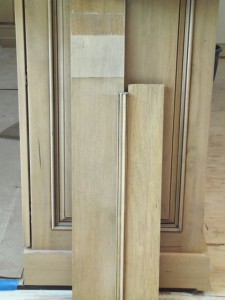
Wood Finishing - Our Samples

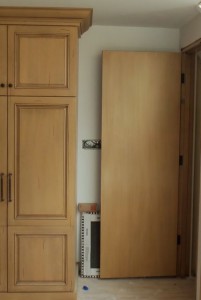
Painting in Partnership, from the Chicago area, was recently faced with an unusually high wood finishing challenge: Matching a factory-applied, six-layer lacquer cabinet finish unto two doors, casings, railings and baseboards. Everything had to be field-finished and spray equipment was not an option. Achieving an “exact” match was part of the requirements for this job.

As you may know, lacquer dries almost instantly and each coat melts into the previous one. The cabinet manufacturer had given us the products to use for the wood finishing. However, we could only use two of the products: the toner and the glaze. We had to separate the toner coat from the glaze coat with two layers of Enduro clear waterborne urethane made by General Finishes. Why did we use two layers: any holidays or shy areas in one clear coat would have ruined the toner coat when the glaze was applied! How did we get around the quick dry times: by using the skills of two well-coordinated craftsmen! The challenge was especially acute when we painted the twenty-five square foot door.

Wood Finishing - Final Result

To complicate things further, the wood used for the cabinets was alder and the wood used for the field woodwork was birch. A clear coat applied over alder wood results in a lovely brownish color. However, a clear coat over birch creates in a much lighter color. Since we were given birch to work with, we had to stain the birch wood to match the color of a sealed alder, so we could start our wood finishing on the same footing as the factory production. We used a quick drying waterborne stain from General Finishes and a seal coat on top of it, before we proceeded with the lacquer toner.

In all, eight layers were needed to create the desired matching finish. Our craftsmen at Painting in Partnership are experts at using cutting-edge products and technologies to meet the most challenging of our clients’ needs, that they involve wood finishing or any other aspects of painting and decorating or historical restoration.

For Wood’s Sake!

Wood finishing played an unusual and important role in a recent house painting project. Nineteen years ago, when their townhouse was being built, the owners walked in and saw a massive, twenty-seven foot wood beam holding up the gable of their 2-story foyer/living-room space. They were excited at the thought that this beautiful beam would grace their new home.

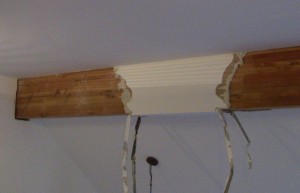
Removal of Drywall from Beam Surfaces

Removal of Drywall from Beam Surfaces

When they came back at the end of the day to check on the day’s progress, the owners were shocked to see that the beam had been dry-walled to blend in with the ceiling. From that point forward, the owners quietly mourned the loss of their wood beam. They wondered if the drywall could ever be removed and their beam restored with an appropriate stain and varnish.

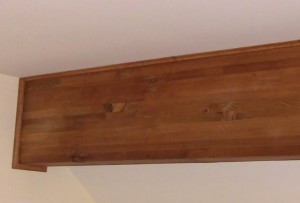
Restored Wood Beam - Stained and Varnished

Restored Wood Beam - Stained and Varnished

The owners recently called on Painting in Partnership to come out to look at some water damage around a few windows. In the course of the conversation, the owner confided in me about his long lost wood beam and asked what we might be able to do. I recommended that we test an area to see make sure that no glue had been used and that the drywall could be removed. Since that part of the house had not been painted in a long time, I also recommended that we not only refinish the beam, but also repaint the adjacent areas. The owners gave us the go-ahead with the project!

The testing revealed that no glue had been used and the drywall could be safely removed. The clients were delighted! We then added trim pieces on the edges of the beam to give a really professional look. After the staining was completed, we used a dead flat varnish to enhance the beam’s natural appearance.

A commitment to understand a client’s vision and desires for their home is part of what distinguish us as painting and decorating contractors in the Chicago area. Being of service in this way delights everyone involved in the painting project.