


Ascertaining the Proper Spacing
As painting and decorating Contractors in the Chicago area, we are occasionally called upon to do a custom stenciling project. A custom stencil is a completely made-up image or an enlarged version of a much smaller pattern that is cut into a stencil, to be used to create the desired composition, in this case a wall treatment. Quite a few steps are involved in the planning of a custom stencil project, which we will now discuss.
Establishing the Proper Stencil Size
In our case, our client came across a pattern that he liked, whose dimensions were 2.5’ x 2.5”. In discussions with the client, it was ascertained that a 6” pattern would be the optimal size for the space. We then headed out to the print shop to enlarge our small pattern to a 6” size. Once we achieved the desired size, we made about 18 copies of the stencil patterns and cut them into 6” squares. We were then ready for the next step.
Choosing the Color and Style
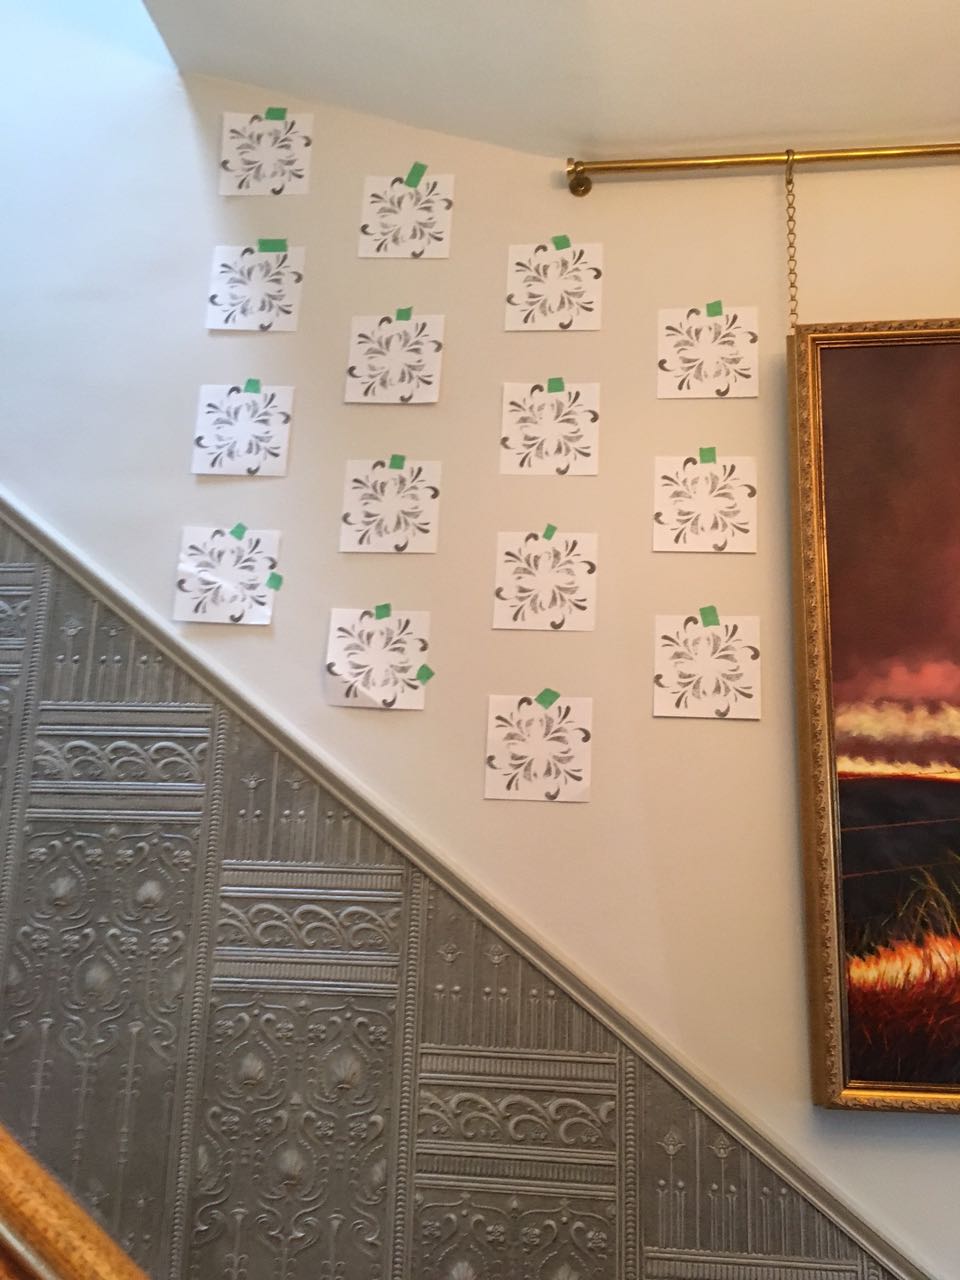
Ascertaining the Proper Spacing of the Stencils
As shown in the attached picture, that process consisted of temporarily attaching the pattern to the wall, trying two or three possible layouts. We finally settled on the one in the picture.
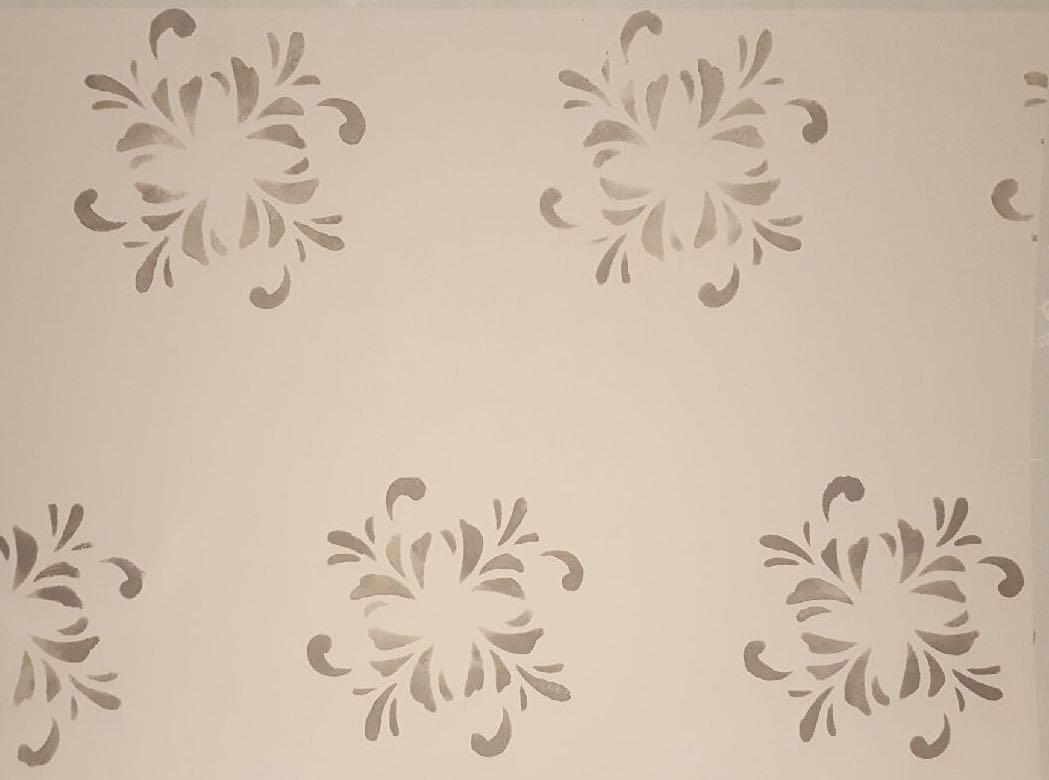
Choosing a Color and Style of the Stencil Pattern
This step included both choosing the color and the style of application. As shown the next picture, we first prepared a sample board showing stencils using a pewter color, applied in slightly different styles. The client immediately commented that the pewter color was too much brown. From the sample, we were also able to ascertain that he preferred a lighter touch of application. Fortunately, we had brought an other pewter color and we proceed to create a new sample that used the new color and the proper style of application. The new sample hit the spot!
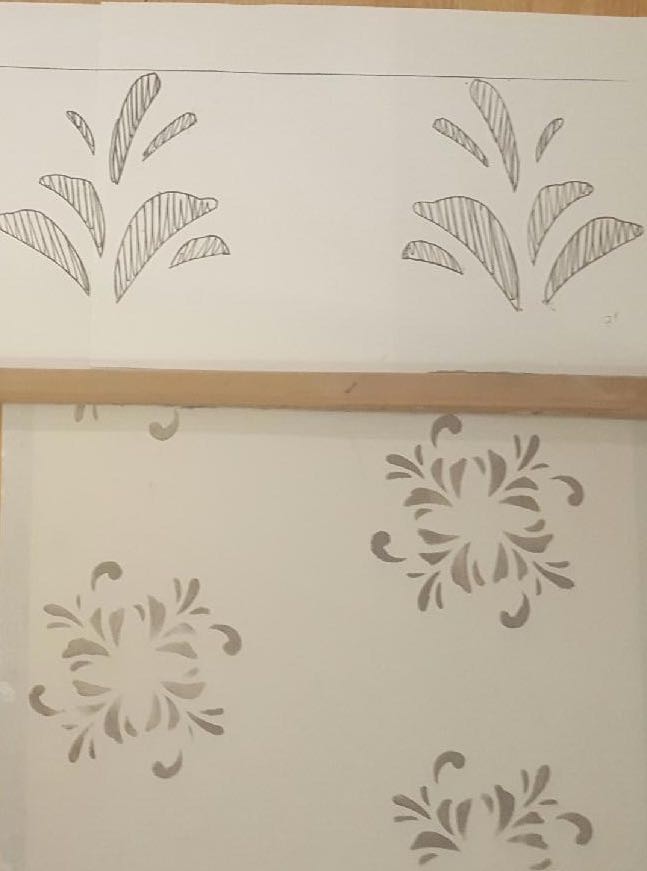
Selecting a Pattern for the Border
Selecting a Pattern for the Border and its Size
Up in the stairway, there is a picture molding and a border space of 12” above it. We could not keep this space blank. We chose a fragment of the wall pattern and followed the same steps all over again to arrive at the right size of the pattern. We then produced a final sample board for the client’s approval as shown in the last picture.
A project like this involves much advance planning. Once the project begins, more work goes into the actual cutting of stencils and the actual layout in the client’s space before any paint is touched. Painting is the easy part!
 Follow
