I feel that all your employees are true artists and professionals, and their commitment, creativity and craftsmanship are evident in the finished product.
- Diane Hohmann, North Barrington
Phone: (847)934-8885 | Email: info@paintpartner.com Visit PIP's Facebook Page View Mario Guertin's LinkedIn Profile Visit PaintPartner's Google+ Page Follow PaintPartner on Twitter Visit PIP's Pinterest Page Visit PIP's Houzz Page Subscribe to PaintPartner's RSS Feed

Archive for November 2011

Not Just a Great Looking Paint Job, but One that Lasts!

Surface Preparation

On a historical paint restoration project, the customer expects not only a great looking paint job, but one that will last a long time as well, because of the considerable costs involved. There are several factors that contribute to the higher cost of a paint restoration project.

First, such projects often require an extensive level of surface preparation because of the poor condition of the old coatings. These surfaces have often not been painted in fifteen or twenty years, or even longer. Consequently, surfaces will likely require epoxy restoration and even the reproduction of custom moldings or ornamentation.

Second, historical restoration almost automatically requires compliance to RRP rules to protect everyone and the environment from exposure to lead paint dust. That means additional containment steps and costs.

Scaffolding

Finally, old buildings in a big city like Chicago, are often situated right next or close to the sidewalk and very close to the neighbors. Consequently, gaining access to the surfaces to be worked on can also require the renting of special equipment like a canopy, scaffolding, boom and the procurement of all the required permits.

On a recent paint restoration project, the rental and permit costs alone exceeded $10,000. If you are the owner of such a building, how long would you like the paint job to last? I would say as long as possible! This means that, as a house painting contractor, I must ensure that our surface preparation is as thorough as possible. Additionally, the primers we use must be the best suited for every surface we work on. For example, we recently used an alkyd, high-solid, direct-to-metal primer to give a full prime coat to 120-year old tin cladding. On old wood moldings, where the old paint had mostly been removed, we used a two-part clear epoxy sealer to prime those surfaces. The goal of each phase of our work is: the longevity of the paint job!

A Paint Color Makeover – Before and After

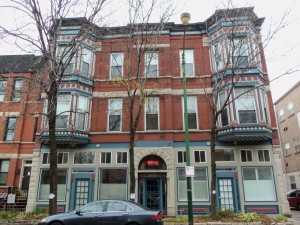
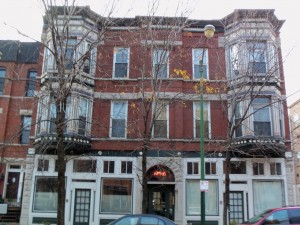
This 1889 vintage Chicago building was in sore need of a historical paint makeover. The consensus among the owners of its ten condos was that the old color scheme did not do justice to the period, the style, nor the masonry materials of the building’s facade. The owners were unanimous in their desire to have a color scheme that flattered the beauty and history of their building.

We met twice with a committee of the owners most interested in being involved in the selection of a new color scheme. The first time we met was a fact-finding mission where we learned about the owners’ color likes and dislikes. We incorporated that feedback in developing a color palette that we felt would produce the desired result. To facilitate the communication with the owners, we prepared a sample board showing a mockup of key sections of the building using the six-color palette we were recommending. During the second color consultation, we went over the sample board with the owners. Based on the feedback we received, we made one change to the color scheme. We now had the green light to proceed!

Three hundred fifty hours of work later, the owners, neighbors and pedestrians in this busy neighborhood are now able to rejoice in the new period colors of this vintage building and have a renewed appreciation for the beauty of its Victorian period details. Here is what one of the owners had to say:
“The paint color palette turned out better then we could have hoped for. You and your wife were able to help our association come to an agreement on a historically accurate plan that incorporated all of our feedback in a matter of two meetings, something that would have taken us months to do on our own. The painted areas now complement and accentuate the beautiful stone and metal features of our building, instead of clashing like a sore thumb. In a neighborhood where many building owners have chosen to paint such metal features a uniform color, to save the effort and cost, our building is now a shining example of what these historic buildings can be. Given the feedback from the neighborhood, I hope our building will be an inspiration for others to make the extra effort to celebrate the unique architectural character and history of our community.”

Below are some before and after pictures of key portions of the building.

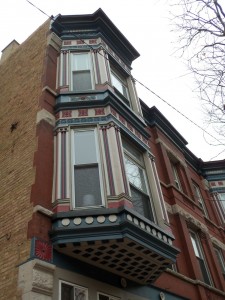
Bay Window After Paint Color Restoration

Bay Window Before Paint Restoration

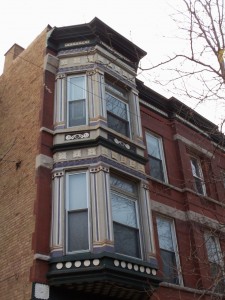
Facade After Paint Color Restoration

Facade Before Paint Color Restoration

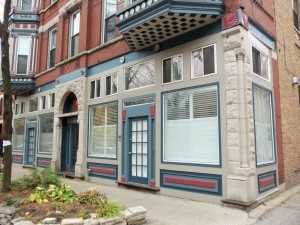
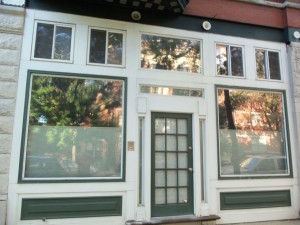
Front Unit After Paint Color Restoration

Front Unit Before Paint Color Restoration

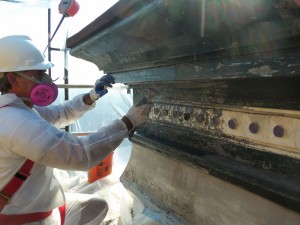
Containing Lead Debris During the Restoration of a Vintage 1889 Building in Chicago

Containing Lead Paint Chips

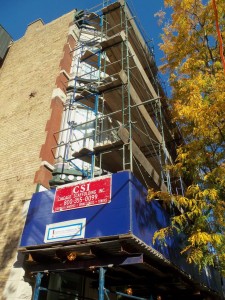
Scaffold Lead-Safe Containment

EPA’s RRP rules define the principles to follow to ensure a lead-safe painting project involving buildings built prior to 1978. Our paint restoration project on the façade of this 1889 vintage Chicago building surely fell into this category. Outlined below are the steps we followed to comply to the requirements of the RRP rules on this high visibility exterior painting project.

RRP rules layout the principles, but do not get into the specifics of how to comply to the rules. Their intent is to ensure containment of the dust and debris, so that the workers, the public and the environment are protected from the harmful effects of old lead paint. Consequently, depending on the specific conditions of each project, work practices must be devised that will ensure the containment of the dust and debris.

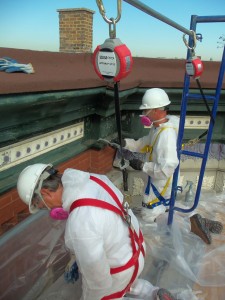
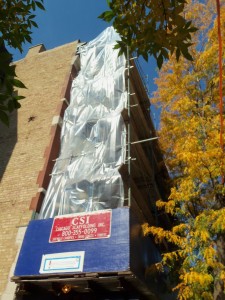
In the case of our Chicago historical restoration project, almost all our work took place above a busy sidewalk, on a canopy and four layers of scaffolding above it. One of the first measures we took was to build a 4-mil, plastic shield on both ends of the scaffold, from top to bottom in order to prevent debris from falling out of the scaffold area. We then sealed the floor of the canopy using heavy-duty blue taps. Contrary to plastic sheeting, blue tarps are not slippery, which is an important safety factor in selecting floor containment materials. Every work area was then sealed with 4-mil plastic sheeting to capture the debris, as it was generated by the carbide wet scraping and wet sanding. To protect our painters from the dust, we used full-body coveralls and P-100 respirators.

Following RRP rules on interior and exterior paint restoration projects is critical to ensure the safety of everyone involved. As a Lead-Safe Firm, we are committed to fulfill the intent of EPA rules on all our painting projects.