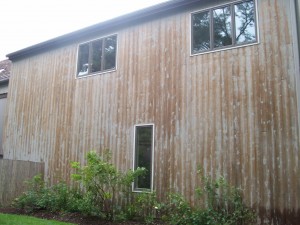
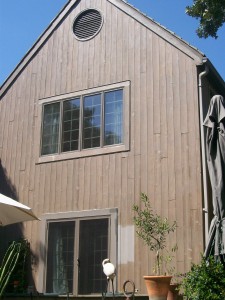
The walls are far too beautiful, and anything that hopes for a place in front of our walls will have to prove its worth first.
- Richard Medina, Palatine
Phone: (847)934-8885 | Email: info@paintpartner.com Visit PIP's Facebook Page View Mario Guertin's LinkedIn Profile Visit PaintPartner's Google+ Page Follow PaintPartner on Twitter Visit PIP's Pinterest Page Visit PIP's Houzz Page Subscribe to PaintPartner's RSS Feed

Archive for Paint Restoration

Getting the Old Barn Ready for Resale

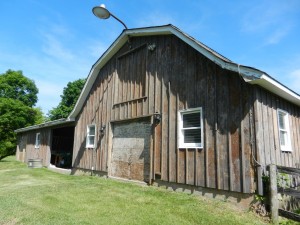
Old Barn in Need of Restoration

Getting this old barn ready for resale required a serious dose of restoration to its cedar siding and its coating. As Chicago’s experts in the nurturing of old buildings, this new client called on us to help her in getting her 9-acre property ready for resale. Having now raised her family and lost her husband several years earlier, she was now ready to let go of her beloved property in the rolling meadows of Barrington Hills.

Our client’s immediate concern was for her eighty-year-old barn. She felt badly that her 8-horse barn had been so neglected over the years. It now looked like a liability – a problem that a future owner would have to deal with. Many boards had cracked, warped and decayed. The coating on the siding also showed extensive peeling. Her need was for us to help transform the barn from a liability into an asset in the eyes of a future owner.

Epoxy Restoration, Caulking, Wood Replacement and Lots of Scraping

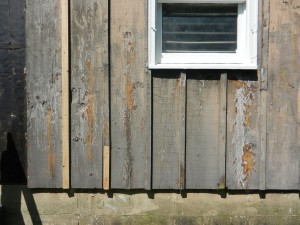
The restoration of the barn involved extensive scraping of the failing coating. It also involved a mixture of wood replacement, epoxy restoration and caulking to arrest or reverse the damage to the cedar siding. In one corner of the barn, water had been infiltrating into the barn and ruining the drywall in a front room. We used cold asphalt to fill a wide space between the driveway and the barn’s siding. We then replaced the damaged drywall with cement board to minimize the effect of any possible future water intrusion. Over one hundred hours were invested in the restoration part of the work, including the carpentry.

As historical restoration experts, we believe that old buildings have intrinsic value and are worth preserving, often time because of the materials used and the craftsmanship involved in the construction. This old barn was a good example of that. The barn’s inside was clad with 12×2 planks arranged horizontally. The exterior was clad in 12×1 cedar vertical planks and 2×1 boards to cover the gaps between the planks. For a future owner interested in having horses on their property, the barn is now a true asset!

Gearing Up for a Chicago Oldie’s Paint Color Makeover

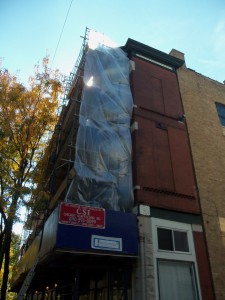
Scaffolding and Dust Containment

A paint restoration project can involve much advanced planning and equipment, especially for an old building in a large urban area like Chicago. Before any work can be performed, power lines will have to be moved because of their proximity to the work areas. The Chicago Department of Operations handles that service, at a hefty cost! Additionally, there may be an additional low voltage wire for police and fire communications that will need to be wrapped. That service is performed by a different Chicago Department, this one at no cost, amazingly.

An old city building is often right up against the sidewalk and, if it has bay windows on its façade, the building actually extends three or four feet over the sidewalk. Consequently, city ordinances require the erection of a canopy over the sidewalk to protect pedestrians. It also must remain lit from dusk to dawn. Once that work is completed, the scaffolding can then be erected to ensure safe and comfortable access to all work areas. In the case of our paint restoration project in the Old Town neighborhood of Chicago, four layers of scaffolding covering the entire façade needed to be installed. The scaffolding company secured the necessary permits prior to installation. Lastly, our painting project will require the rental of a scissor lift to reach a section of the cornice that extends into the alley. A separate permit has to be secured for the use of space in the alley.

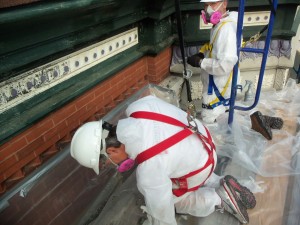
Personal Safety Equipment

Once the work above has been completed, two important aspects need to be addressed before work can begin on the painted surfaces. First, dust containment must be set up, as required by the RRP rules. In our case, it involved the set up of 4 mil plastic barriers on both ends of the scaffolding, the use of 6 mil plastic to seal the canopy to the edges of the building and the containment of the work areas to capture the paint debris and dust. The second aspect involves personal safety equipment to meet OSHA and EPA requirements. In our paint restoration project, it involved the use of fall arrest protection equipment, hard hats, dust suits, special respirators and eye protection. Having now completed all the surface preparation, we are ready to paint, finally!

Peeling Paint Forensics on a House Painting Project

Investigating the cause of peeling paint is critical to doing proper and long-lasting paint restoration, especially for exterior repaint projects. Skipping that step can easily lead to incomplete surface preparation and result in premature paint failure. Read on for an illustration of this principle.

East Side - After Scraping, but Before Sanding

East Side - After Scraping, but Before Sanding

Someone to whom I had given a house painting proposal four years earlier called to tell me how sorry she had been for not hiring my company to repaint her house. Within six months, her new paint job had started to peel. She said that she had chosen a lower price at that time. She said that she was not going to make the same mistake again and wanted Painting in Partnership to do the paint restoration work on her house this time.

Indeed, the South side of her house did show extensive peeling: the paint was peeling down to the bare wood. However, a cursory review of the rest of her house did not reveal much of a peeling issue. What was going on to cause the paint to entirely delaminate from the wood siding?

South Side - After Adhesive, Tinted Primer

South Side - After Adhesive, Tinted Primer

Upon closer examination, we noticed that there was a lot of dead wood fiber attached to the back of the paint chips. It is a known fact that paint cannot adhere to dead wood fiber. We then proceeded to test the adhesion of the paint surfaces that appeared as stable and gave no sign of peeling only to discover that the paint was coming off in sheets! So, even though the paint film gave no sign of impending failure, there was no adhesion between the paint film and the siding. It was only a question of time before it all peeled away. Our theory for what may have caused the problem was that the wood may have sat too long in the elements before first getting coated, but we could not know for sure.

Having diagnosed the problem, I approached the client with a prescription for how to remedy the situation:
– The paint had to come off wherever possible.
– The siding had to be completely sanded to remove all the dead fiber.
– We recommended a high-built, tinted, adhesive primer to ensure that the paint that had not come off would continue to stay put.

All this additional preparation work took about 110 hours of labor, which the client gladly paid for. Our client got what she wanted all along: a long-lasting, good looking paint restoration job! Eighteen months later, there is no peeling paint anywhere on her house.

When Lightning Strikes, Act Quickly!

Lightning strikes and the need for paint restoration pretty much go hand in hand. A couple of weeks ago, we received this email from a client: “Call me. House took a direct lightning hit on Sunday. Fire on roof. Your faux finish is ruined.”

Lightning Strikes on Tip of the Roof

Lightning Strikes on Tip of the Roof

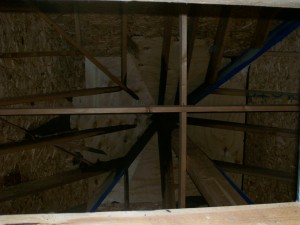
Fire Damage to Roof Beams

Fire Damage to Roof Beams

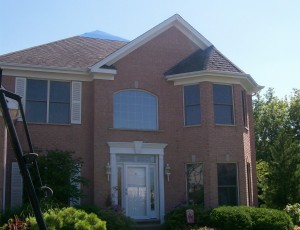
Lightning struck on the highest point of the house (as shown by the blue tarp) on a Sunday morning. The owners were unaware that the house had been hit. Fortunately for them, neighbors saw the lightning strike. Shortly thereafter, they noticed smoke coming out of the roof and called 911 immediately. The fire department rushed to the scene and extinguished the fire.

In spite of the neighbors’ vigilant eyes and the fire department’s quick response, the house suffered significant damage from fire, smoke and water. All things considered, the damage could have far greater if the response had not been so quick.

The restoration work will involve structural work to repair the roof beams, carpentry, new insulation, replacement of damaged drywall and paint restoration to a number of rooms affected by smoke and water, including about 1,000 square feet of a decorative painting finish in the foyer and halls. During the restoration process, the owners’ belongings will be in storage and they will be living in a rented house.

When lightning strikes, Painting in Partnership, from the Chicago area, stands ready to assist in all aspects of paint restoration, from the repainting of surfaces to the replication of existing finishes.

Resolving the Issue of Peeling Paint and Spalling on Painted Brick

Paint restoration sometimes requires starting over, especially when it comes to painted brick. Painting brick is not a good idea, especially when you are dealing with common brick. Common brick was fired at a lower temperature and was therefore softer than face brick. Common brick was usually used on the rear and sides of buildings. Face brick was used on the front of the house and was much harder and durable, and also more expensive. So, why is it not a good idea to paint brick?

Brick structures are designed to breathe and let moisture escape out through primarily the mortar joints, which are purposely made a lot softer than the bricks it is holding in place. Mortar is the sacrificial component of masonry. In the process of acting as a transport for moisture, it eventually falls apart, but the bricks stay intact. When painting contractors paint brick, it interferes with the design of the masonry and, therefore, the moisture gets trapped. It finds its way inside of the building, or causes the paint to fail and the brick to deteriorate, or both.

Peeling Paint and Spalling on Painted Brick

Peeling Paint and Spalling on Painted Brick

Old Limewash Visible on Exposed Brick

Old Limewash Visible on Exposed Brick

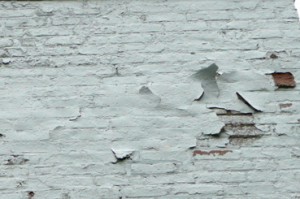
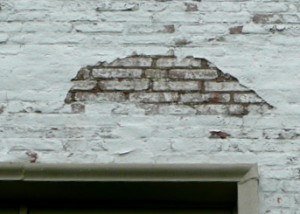
The first picture shows what can happen when common brick is painted: paint peels and brick spalls, as indicated in the right side of the picture. Then, what is the solution to this problem? The next picture gives a clue as to what the solution is.

The white substance you see on the exposed brick area is limewash, which has been used through the ages to beautify masonry structures. Unlike paint, limewash becomes one with the masonry and allows it to breathe and act as it was intended to. There are countless European masonry structures finished in this way.

Unfortunately, if brick has been painted and problems like this occur, the remedy will entail the stripping of the layers of paint. The work will also likely include the replacement of the spalled bricks and the re-pointing of the failed joints with similar mortar. This work will have to be done before limewash can be applied. In order to achieve an opaque look, three or four coats of limewash will have to be applied. Over time, when the limewash wears off, one or two more coats will rejuvenate the look.

As indicated at the outset, paint restoration sometime requires starting over. This is the kind of knowledge and resources Painting in Partnership brings to bear on its work on older homes and “period” homes, in the Chicago area.