I would have any of his people over at my house for dinner!
- Lois Gries, ASID, Chicago
Phone: (847)934-8885 | Email: info@paintpartner.com Visit PIP's Facebook Page View Mario Guertin's LinkedIn Profile Visit PaintPartner's Google+ Page Follow PaintPartner on Twitter Visit PIP's Pinterest Page Visit PIP's Houzz Page Subscribe to PaintPartner's RSS Feed

Archive for Wood Refinishing

Have you Ever Thought About Painting those Wood Spindles?

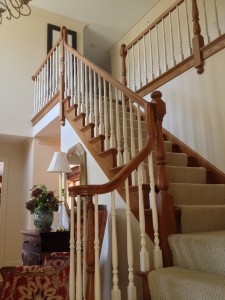
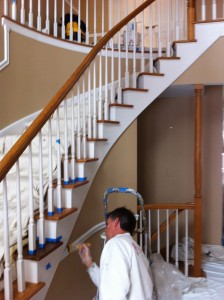
Oak Railing – After Painting Spindles

As painting and decorating contractors in the Chicago area, we are often asked if we could paint the spindles in a wood staircase. Almost always, it is the lady of the house asking this question. Women are often less found of the “Wood Look” than men. Painting only the spindles can be not only a good compromise between the two spouses, but also a smart design touch.

Just painting spindles on a wood staircase is a labor-intensive endeavor. To do a quality job, there cannot be any paint on surfaces other than the spindles. To accomplish that result, we have to tape off the steps around the bottom of the spindles and sometime the top as well. Next we scuff-sand the spindles and then apply one coat of bonding primer to ensure a good adhesion to the old finish. The spindles then receive two coats of waterborne enamel. After adequate dry-time, the tape is removed, along with any paint residue. To be efficient and to produce the best result, two people should simultaneously do the priming and painting steps.

Keeping the peace in the household about the “wood look” by painting spindles is not only a smart idea, but also a good design choice as well, as shown in our picture

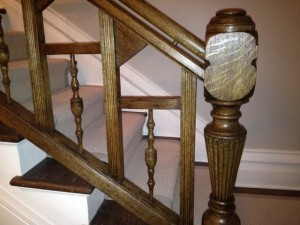
The Restoration of a Hundred-Year-Old Chicago Oak Banister

Wood refinishing is one of our specialties as house painting contractors in the Chicago area. Starting in the mid-1930’s, it became fashionable to paint woodwork, in spite of the fact the wood may have been oak, cherry, walnut or even mahogany. Over the years, the accumulation of paint layers obscured and sometime obliterated the fine carving detail. In this blog post, I will tell you the happy story of the stripping and restoration of a three-story oak banister in a residence on Chicago’s Gold Coast area.

Banister After Wood Refinishing

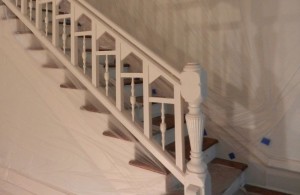
As a painting and decorating company, we are blessed with having clients who consider their role as homeowners to be “custodians of their piece of history”. The client in this particular story fits that description exactly. The client had purchased this vintage residence earlier last year and embarked on a major renovation of the house. They had a clear concern for having the work done in way that preserved the integrity of the house and flattered its architectural features. One of those features was the banister for the three-story staircase in the center of the house. The wood had been coated in multiple layers of oil-based paint and the clients were dreaming of restoring the original beauty of their banister.

Banister Before Paint Stripping

Before launching into this project, they asked their builder to strip a small section to see what kind of wood was underneath. When it was determined that it was oak, the client was sold: strip it all and refinish the banister! Since the wood had originally been stained and varnished, the stripping process completely removed all trace of the paint. Still, much elbow grease was required to accomplish that result. The next step was to come up with a stain color that closely matched the newly refinished oak floor. The final result speaks for itself! Our client has received many enthusiastic comments from neighbors who lauded the new look of the banisters.

Having successfully completed our clients’ wood refinishing project, we will be doing the paint restoration to the metal surfaces on the façade of their building in the springtime. Another example of their “custodial view” is this anecdote. I informed them that the slate roof over the front bay window had previously been painted to match the color of the metal surfaces. When I asked them if they wanted to have the old paint removed to expose the original slate color, the answer was yes! We feel privileged to be part of the process of preserving and restoring the beauty of old buildings in the Chicago area!

Darkening Already-Finished Woodwork, Without Stripping the Old Finish

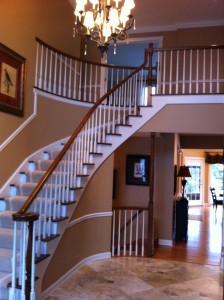
This week, we refinished a client’s staircase, taking it from a traditional oak color to a rich brown mahogany color. This client has been upgrading her house for many years and repainting as she went along. The last spaces she redecorated were her 2-story living room, a two-story foyer and upper hall, as well as the basement.

Wood Refinishing - After Wood Toning

Wood Refinishing - Before Wood Toning

During this past summer, she had her front door system replaced with fancy fiberglass doors, which we finished in a brown mahogany color. Upon completing that project, she realized that, when she is ready to redecorate the foyer, she would need to darken the stain color of her staircase, in order to balance off her new doors’ color. Achieving that change in woodwork color is what we call wood toning.

As painting contractors in the Chicago Northwest suburbs, wood toning is one of our specialties. Several years ago, we introduced our client to wood toning when we altered the blond color of her knotty pine ceiling beams, in her study, to a walnut color, in order to match the woodwork color of the adjacent room. So, in the case of her foyer, she knew exactly what to ask for. This is what happens when we educate our customers on the magical possibilities in the field of painting and decorating!

The wood toning process first involves the light sanding and cleaning of surfaces to eliminate any possible contaminants from the surfaces. We then use a gel stain to tome the surfaces with a thin veil of color over the existing stain color. This is the most critical step to achieve a beautiful look. It requires skill and artistry. Once toned, the surfaces are then varnished. Voila!

Wood Toning is a Great Way to Erase Years of Wear on Woodwork

When refinishing stained woodwork, stripping the old finish and starting over is very time-consuming and expensive process. The good news is that, in most cases, stripping is not necessary in order to rejuvenate your existing woodwork and make it look like new again.

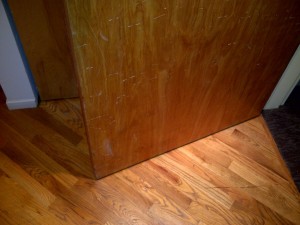
Toned and Re-Varnished door - Before

As house painting contractors, based out of the Northwest suburbs of Chicago, we regularly get called on to rescue the stained woodwork in clients’ homes. After living in a house for over twenty and raising a family, the woodwork often gets a look worn out! Doors and door casings seem to show the most wear – a problem sometime compounded by pets, as shown in the attached picture. Surfaces, like these, that show nicks, scuffs and wear patterns, can be brought back to life by first cleaning the surfaces to remove the dirt, dust and oily residue that have accumulated over time. We then use a gel stain to add a very thin veil of color to the existing woodwork. That stain penetrates and hides all the unsightly blemishes and makes the wood look fresh again. We call this step “toning” the woodwork. Lastly, we re-varnish those surfaces.

Toned and Re-Varnished door - After

We also regularly encounter situations where the finish on the interior bottom rails and sills of the windows breaks down due to effect of the sun and moisture condensation. In many situations, the finish is completely gone and the wood may even show water stains. For some reason, we encounter this problem almost exclusively with casement windows. In a situation like this, before toning the wood, we first sand the damaged areas bare and then stain them with a matching color. After the stain application is dry, we proceed with the toning procedure.

The second picture shows the completed wood refinishing project, after the toning and varnishing have taken place.