Mildew on the Eaves of a House
Mildew is a particular type of mold. On the exterior of a house, it is most commonly found on the North side, away from the sunlight. To survive, Mildew needs darkness, food and moisture. Power washing alone does not kill mildew. A bleach solution (coupled with a cleaner) has to be used. This is our standard approach to effectively deal with mildew.
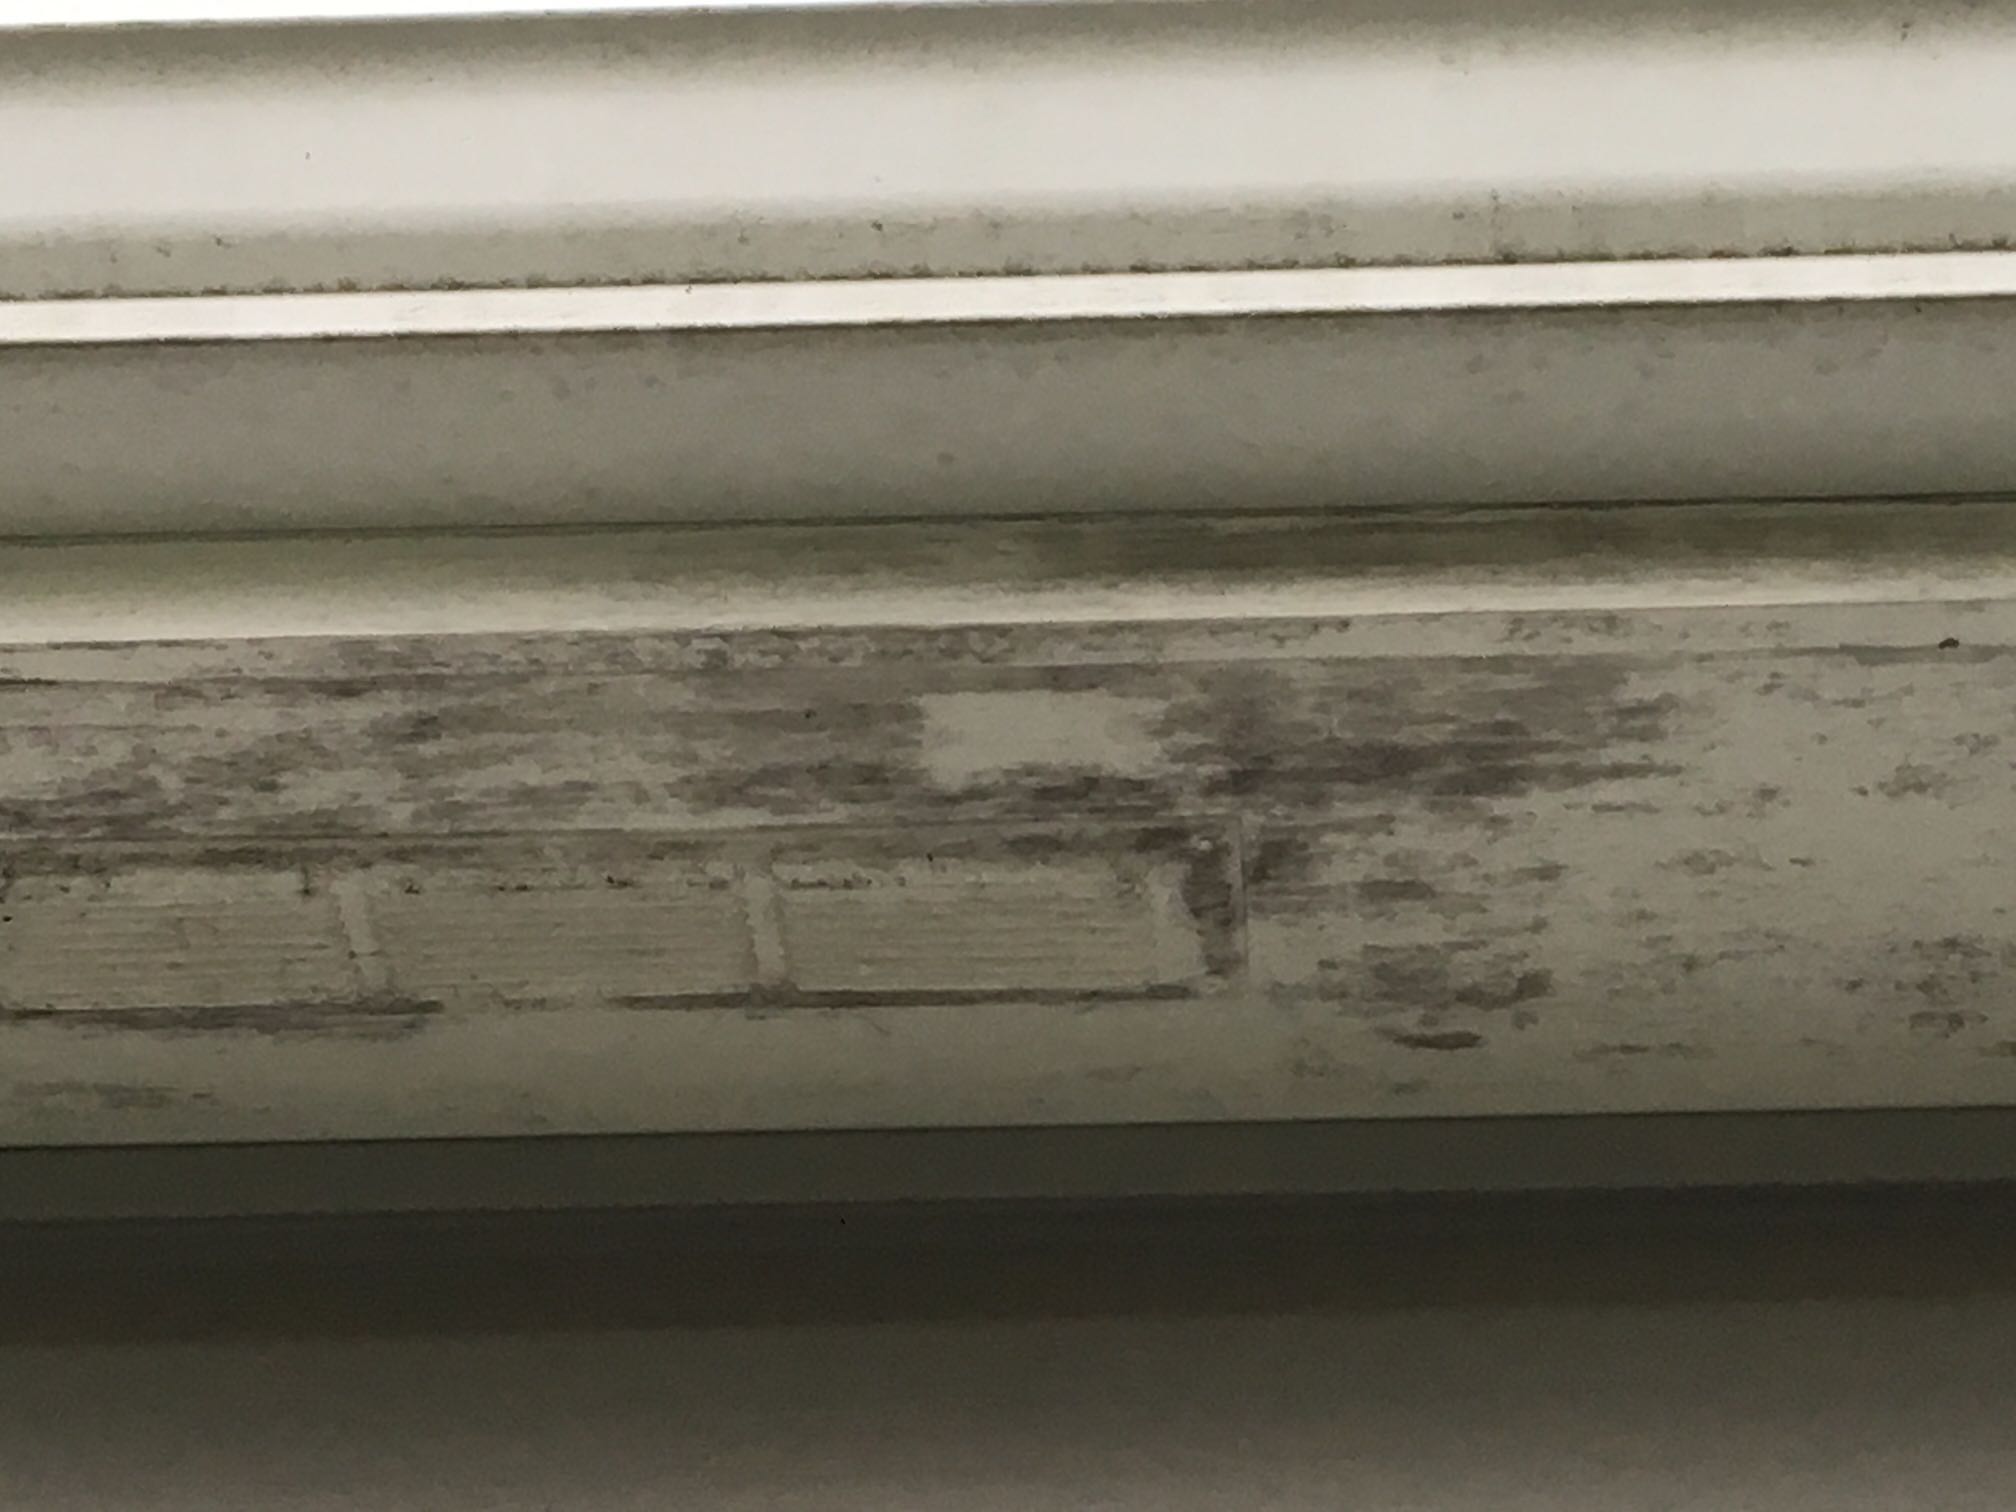
The attached picture shows a bad case of mildew. At best, it makes the house look dirty. At worst, it makes the surface look downright bad! I saw the house in the attached picture earlier in the week. At first, my recommendation, after killing the mildew, was to use two coats of a proven mildew-proof paint on the eves to prevent or delay the future growth of mildew – the client seemed really interested. However, upon second thought, I asked myself: “will my paint solution get at the root of the client’s problem?” I had to answer NO! I then proceeded to ask the client if his bathrooms were venting into the attic. His answer was yes! He also said that the last painter painted his vents shut.
I advised my client to consult with a contractor about rerouting the venting for his bathrooms and getting new vents for his eves. The client may still decide to use mildew-proof paint on his eves, but his long-term problem will now be solved. Looking for the client’s long-term interest, we call that in my company “Taking a Custodial View”. We believe in that approach.
 Follow