Phone: (847)934-8885 | Email: info@paintpartner.com Visit PIP's Facebook Page View Mario Guertin's LinkedIn Profile Visit PaintPartner's Google+ Page Follow PaintPartner on Twitter Visit PIP's Pinterest Page Visit PIP's Houzz Page Subscribe to PaintPartner's RSS Feed

Author Archive for Mario – Page 22

An Ice Chest Is Now Ready for Auction Night

Every year, as painting and decorating contractors in the Chicago area, we participate in a Palatine community project whose main attraction is an auction of hand-painted objects for the benefit of the local Chamber of Commerce and area charitable organizations. In 2009, the item we decorated was a park bench and last year, it was an Adirondack chair. This year’s event is called “Chillin’ in Palatine” and features ice chests as the item to be decorated by local artists. The auction will take place on October 13th.

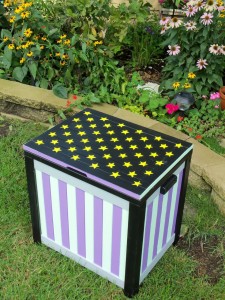
Hand-Painted, Five-Color Ice Chest

As in years past, Painting in Partnership is one of the sponsors for this year’s event. In keeping with our slogan “We paint in partnership with YOU”, we partner with other artists in the execution of our designs. This year, we teamed up with Jeff “Kingdom” Kilpatrick, a well-known artist from Chicago to develop the concept for the decorating of the ice chest. Jeff’s idea for the chest consisted in an artistic re-interpretation of the American flag, complete with all 50 stars! The stripes are purple and celery green. Black and gray are used as accent colors and the stars are a bright yellow.

Our staff did the bulk of the painting. Jeff did the hard work! He spray-painted the fifty stars on the cover of the chest. The chest was then coated with a clear protective coating. In all, twenty four hours of labor went all aspects of the painting.

The decorating of this ice chest demonstrates how we, as painting contractors, team up with other craftsmen and artists to create beauty for our clients.

Checking Wood Door’s Weather Stripping Saves Money

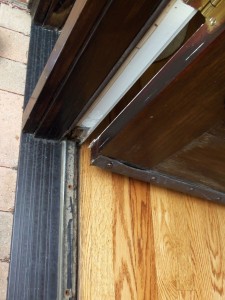
Wood Front Door - Before Refinishing

As house painting contractors in the Chicago area, we regularly are called on to refinish wood doors. Wood front door systems are subjected to major abuses by the sun and the elements. Consequently, making sure that the weather stripping around the door is in good working order is of critical importance. A recent project, made that point clearly.

As shown in the attached picture, the threshold has completely fallen apart. In fact, the owner had thrown it out. Additionally, the left jamb has begun to rot away as well. The varnish on the door has turned milky and signs of checking are evident. Needless to say, this entrance door has suffered from significant neglect over the years. Fortunately, the moisture had not reached the interior wood floor, which would have dramatically increased the cost of the repairs.

Before any wood refinishing could be done on the door, we rebuilt the threshold. We also installed new weather stripping on the bottom of the door and around the jamb.

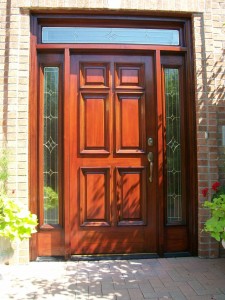
Wood Front Door - After Refinishing

Next, the rotten wood was on the jamb was removed and we used epoxy consolidators and fillers to restore the wood to a sound condition. The door system was then stripped and refinished. Here what the final result looks like.

A wood door with sunny exposure requires periodic maintenance to ensure proper functioning and avoid having the go through the big expense of refinishing the door. To accomplish this goal, we recommend our clients a maintenance program every two or three years. They gladly accept, because they want their door to look beautiful and keep the expense down.

1927 Antique Wallpaper Book – Preserved

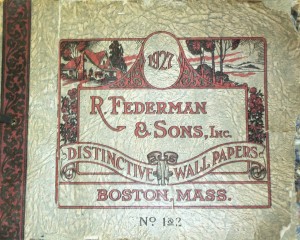
1927 Period Wallpaper Book

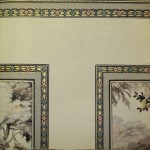
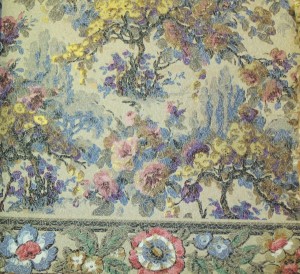
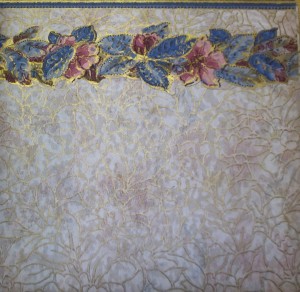
I recently purchased a wonderful 1927 book of wallpaper samples, borders and chair rail designs – in all over two hundred samples. The manufacturer was R. Fedderman & Sons, Inc. of Boston. Included in this post are a few samples of these period wallpapers. The first sample layered two different wallpapers. The first one showed scenes and the second one created framing for the scenes, making the room appear as if it were covered with artwork. How did the tradition of using wallpaper begin?

Starting in the Middle Ages, the nobility began to hang large tapestries to give more visual warmth and interest to their otherwise stern looking stone walls. However, the cost of tapestries was out of the reach of all but a few privileged people. Wars and other political issues also often interrupted the trade of such items. Not surprisingly, the first wallpapers that were made depicted scenes reminiscent of to those on the tapestries.

England and France were the early leaders in the manufacturing of wallpaper. In those days, wallpapers were hand printed using hand-carved blocks of paper, which was an ancient printing method. Today, Zuber at Cie. of France is the only known wallpaper manufacturer still producing wood-blocked wallpaper.

The Industrial Revolution transformed the wallpaper-making process. At the end of the eighteen century, a machine was inverted that made continuous lengths of wallpaper. Early in the nineteenth century, the first steam-powered printing presses were invented in England and made possible the mass production of inexpensive wallpapers, thereby making it available to the middle class. Those technologies were quickly brought over to the United States as well. By the time the twentieth century came along, wallpaper had become one of the most popular household-decorating items. It remained so for most of the century. In the late 1980’s, the emergence of Faux Finishing and the development of a myriad of new decorative finishing products and methods sent the wallpaper market into a major downspin, from which it has not recovered yet.

Period Wallpaper Circa 1927 - 1

Period Wallpaper Circa 1927 - 2

Period Wallpaper Circa 1927 - 3

Period Wallpaper Circa 1927 - 4

A Dog’s Advice to Painters About Animal Safety on Painting Projects

Abby's Picture as Staff Writer on Pet Safety

Our dog Abby was recently promoted to Staff Writer on pet safety for our Chicago area painting and decorating company. Her column in our company’s newsletter will be titled “Dear Abby on Pet Safety”. To subscribe to her column, fill out the box in the right-hand column of our Home Page. Here is her first post.

Pet safety on painting projects is important because of the special relationship I have with my owner. If something were to happen to me while you are doing your work, I might end up having to share my dog house with you – I do not want that to happen! So, here are a few tips that would help you in keeping me safe.

First, talk to my owner about which room I should stay in while you are here. I might need to keep an eye on you, but it is best if you do not let me roam around. I have been known to make messes by getting my nose, paws, even my ears into places where I should not. That stuff tastes weird anyway!

Second, it would be a good idea to check with my owner to see if they have an electronic fence for me. Make sure I have my collar on in case I sneak out on you. Also, ask if you might need to let me out mid-day so I can do my business. My owner and I would appreciate that a lot.

When you do work around my house, do not drop stuff on your tarps like razor blades, nails or screws. I can cut myself on those things. God forbid I should swallow one of them!

Another pet peeve of mine (no pun intended) is the leftovers from your lunch boxes. If you leave them in your job site trash bag, I will find them! Believe me, my owner will not be happy when I rummage through your stuff to get to the good stuff in there. On top of that, I can injure myself going through that bag. So, pretty please, take the food with you when you leave my place!

Rescuing a Wood Front Door from the Brink

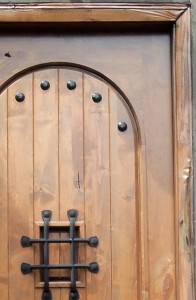
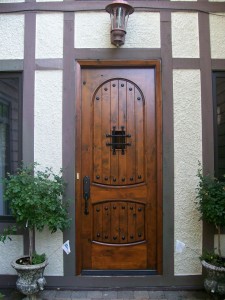
The sun and solid wood front doors are not on friendly terms. In fact, they are enemies! As painting and decorating contractors in the Chicago area, we were recently called on to rescue such a front door from the attacks of the elements. The door had great bones. It was made of solid knotty alder wood and was handsomely decorated with iron studs and a peep door cage.

Wood Front Door - Before Refinishing

Wood Front Door - After Refinishing

Understandably, with such good looks, the owners did not want to hide them with a storm door. Consequently, having a southern exposure, the finish had badly deteriorated, to the point where moisture had rotted the casing in several areas. A molding had also begun to warp. It was definitely time for an intervention.

Upon examination, we determined that the entire casing needed to be replaced. That gave me an excuse to pay a visit to my favorite lumber Store in the Chicago area: Owl Lumber. I personally hand-picked the knotty alder lumber to replace the casing. Our carpenter then milled it to replicate the original profile and completed the installation. The rest of the work involved our finishing expertise.

Our first step was to remove the weather stripping. Before stripping the old finish, we also removed the metal decorations on the doors in order to protect them from the adverse effects of the stripper and improve the overall look of the finishing. Upon completing the stripping and three coats of a tinted flexible varnish of choice, we reinstalled the metal decorations and the weather stripping. Voila!

We explained to our client that, with such an exposure to the elements, we should put them on a low cost, two-year maintenance plan, which will keep their door looking great and keep it out of trouble.