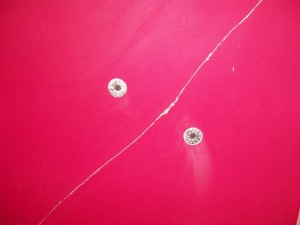
At the outset of their interior painting project, the owners of this 1927 vintage Four-Square House made it clear that they liked the blemishes of their lime-based plaster walls and ceilings, as well as the worn out paint edges of the wood casings and trim elements. They felt that these imperfections gave character to their vintage house.
When estimating the cost of a house painting project, it is always important to properly assess, on the one hand, the level of surface preparation that a client is looking for. On the other hand, it is equally important to assess the repair that surfaces actually require, whether the owners realize it or not. This is where clear communication with the owners is critical in order to ensure that painters and owners are on the same page with what needs to be done. Taking the time to explain the purpose and process of plaster repairs goes a long way in gaining the client’s support for the plaster restoration needed prior to the house painting portion of the work.
Historic three-coat plaster is extremely strong and durable. It is fire resistant, mildew resistant and allows the walls to breathe. Replacing plaster is expensive. Therefore, it is worth making every effort to do plaster restoration wherever possible. By so doing, you preserve a piece of history and the authentic feel of your house!
Plaster being mounted over wooden lath, it has a tendency to crack, over time, when the lath is exposed to moisture. Movement in the building also causes plaster keys to break off from the lath and cause cracks or failure in the plaster. A number of methods can be used to address these issues.
The picture in this article shows a crack that was stabilized by the use of two plaster buttons and wood screws. The screws re-fasten the plaster to the wood lath. Depending on the size of the crack, fiberglass tape can be placed over the crack prior to the patching process.


 Follow
