Throughout the process I felt that achieving the 'right look' for a high-end architectural products showroom was just as important to you as it was to me.
- Richard S. Cohen, Feather River Wood, Wilmette
Phone: (847)934-8885 | Email: info@paintpartner.com Visit PIP's Facebook Page View Mario Guertin's LinkedIn Profile Visit PaintPartner's Google+ Page Follow PaintPartner on Twitter Visit PIP's Pinterest Page Visit PIP's Houzz Page Subscribe to PaintPartner's RSS Feed

Watch Out for Extreme Cold Temperatures when Restoring Plaster

During the course of a recent plaster restoration project, we ran into an unusual weather event in Chicago: two or three days of minus 15-degree temperatures! In a well-heated house, one might reasonably assume that it is safe to work on its interior surfaces. However, a recent experience has shown us otherwise.

Old houses were designed to “breathe”, allowing moisture to escape the house through its plaster walls. Moisture barriers and insulation had not come of age yet. As a consequence, the inside surfaces of the exterior walls can be very cold to the touch, in spite of very warm interior temperatures – check it out! During extreme cold temperatures like what we experienced last week in Chicago, these walls can actually be ice-cold! Much to our chagrin, we also discovered that such cold walls can seriously interfere with the plaster restoration work we do as painting and decorating contractors.

What we discovered is that the walls can be cold enough to cause the moisture in the patching materials to form small ice crystals and prevent those materials from dying and curing properly. Those materials normally generate their own heat, which helps the drying and curing process. The cold walls interfere with that process. Even though the surface of the patching material can appear and feel normal, it is not the case. Unfortunately, using a waterborne primer to prime over the patches can compound the problem by introducing additional moisture into the patches and the walls. The net result of this chain of events is that the primer does not properly adhere to the patches.

Failed Liner Paper Seams

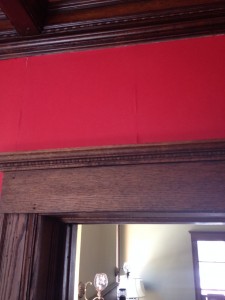
How did we discover this problem, you might ask? One of the rooms in which we were doing plaster restoration was being prepped for an expensive wallpaper installation. Because the walls were plaster and the paper of such quality, we specified that a colored liner be first installed. That was our lucky break since it allowed us to discover our problem BEFORE installing the Burrows paper: the liner paper failed within hours from installing it!

What happened here? As the paper dries, it shrinks a little bit and put strong pressure at the seams. If the primer has not bonded well to the substrate (like in our case), the shrinking paper will cause the primer to delaminate and the paper to come apart at the seams. Lessons learned: Do not patch plaster walls when outside temperatures fall below 20 degrees and use oil primer (sorry for the smells and VOCs) to seal the plaster to help keep the moisture from penetrating into the walls.

As craftsmen, we are on a never-ending quest to learn as much as we can from any situation we encounter and pass on that knowledge to all our clients and people like you, our blog readers.

Repairing Cracks on Old Plaster Walls and Ceilings

Because of our love of old buildings and our desire to preserve them, our painting and decorating company is called on to restore old plaster, especially in Chicago’s old neighborhoods and the North Shore.

Stabilized Plaster Cracks – 1

Cracks in plaster deter many house painting contractors from even submitting a bid for the project. The reason is first that plaster restoration requires specialized knowledge, materials and techniques. Second, plaster restoration is also difficult to estimate, because the scope of the repairs is not entirely known until you start doing the work.

The clients who hire us to restore their old plaster value the many qualities of lath plaster. They are usually not interested in having it look like smooth drywall. They like it unevenness, the imperfections and signs of aging that plaster develops over time. It is part of the “cachet” of an old house to them.

Stabilized Plaster Cracks – 2

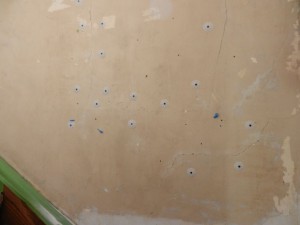
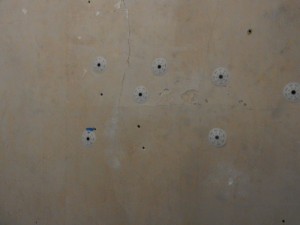
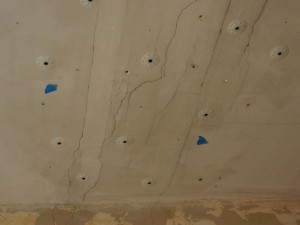
Our clients are however very interested in preserving the integrity of their plaster surfaces. Properly repairing cracks is especially important. When cracks develop on plaster surfaces, it means that some of the keys that attach the plaster to the lath have broken off. This allows the plaster to pull away from the lath and crack off. To deal with this problem, we use a system called “ Big Wally’s Plaster Magic ”. The process consists of drilling holes in the plaster to reach the lath (without drilling through the lath), injecting a liquid conditioner in those holes, then injecting an adhesive in the same holes so it can get between the plaster and the lath. The final step consists of using screws and over-size plastic plaster buttons to reattach the plaster to the lath. The next day, the screws and buttons can be removed and cracks can be repaired in the normal fashion.

Stabilized Plaster Cracks- 3

Depending on the condition of the surfaces, an average size room can take between 16 and 32 hours to perform the plaster restoration. When completed, the surfaces are stable again and they look beautiful. Plaster restoration is not cheap, but the result is well worth the effort.

Steps to Ensure a Successful Lincrusta Installation

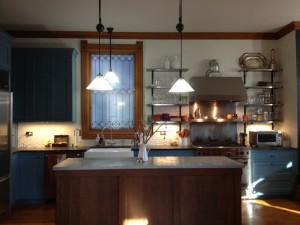
Kitchen Lincrusta Installation

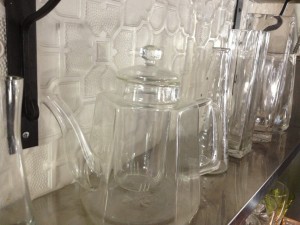
Kitchen Lincrusta Installation – Detail View #1

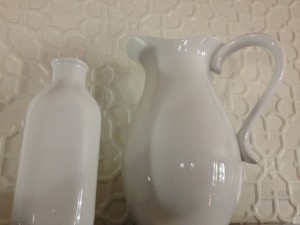
Kitchen Lincrusta Installation – Detail View #2

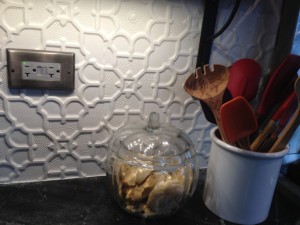
Kitchen Lincrusta Installation – Detail View #3

Since Lincrusta was invented in England, in 1877, it has been used to adorn the walls of the affluent homes of the day – it is still true today when an owner thinks of restoring their “period” house. Lincrusta is an embossed wall covering which is akin to Linoleum, where its name was derived. It is available as dados, friezes and wall coverings. We recently made a Lincrusta installation in a century-old Victorian house in a suburb of Chicago.

Because Lincrusta is rigid and becomes brittle when softened by warm water and glue, its installation presents several challenges. To successfully deal with those challenges, we create templates and use them to cut the paper to mirror the molding profiles. We also take extreme care in handling the paper once wet, as it becomes very brittle. Because of the textured nature of the paper, the cutting process causes small irregularities, which we caulk to ensure tight-looking seams.

Lincrusta is intended to be painted. Before doing so, we wipe off the oil residue from the paper fabrication process using an emulsifier. We then prime the paper and apply a coat of waterborne enamel. To further add to the richness of its finish, Lincrusta can additionally be glazed and vanished.

In the case of our most recent Lincrusta installation, we decided to complete the finishing process with a coat of China White semi-gloss paint, without glazing. The pictures show how nicely the wallpaper complements the open-shelving look of the kitchen. Our client is now ready for the final touch to her kitchen: installing the upper part of her hood!

Helping homeowners restore the luster of their “period” homes is part of what we love to do as painting and decorating contractors in the Chicago area.

What can you Do with that Two-Story Wall in my Living Room?

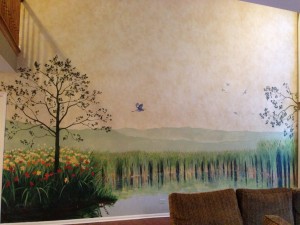
Decorative Finish and Mural on Two-Story Wall

The field of decorative finishing has suffered badly during the recession; however things are looking up again. Decorative painting is reemerging as a powerful design tool to beatify one’s environment and provide creative solutions to modern-day building challenges. One of those challenges consists of these two-story walls in foyers and family rooms of contemporary houses.

Watercolor Rendering of Mural Elements

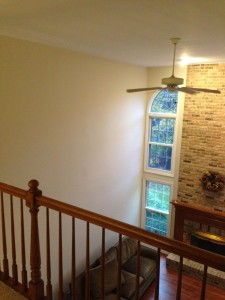
A client recently posed the following question to our Chicago area painting and decorating company: “I have this 20’ x 20’ wall in my family room – what can I do to make it an appealing feature of my house?” After asking a few additional questions, I was able to ascertain that she was looking for something that would have warmth, be inviting, give a feeling of depth to the room and be nurturing to her. I went to my van and brought back a sample board for a one of our signature finishes: a sanded-texture finish, combined with hand-painted mural elements. I explained that the texture and mottled color of the finish would add warmth and a comfortable feel to the wall, while creating a wonderful background for a mural on the lower portion of the wall. She loved the idea!

Two-Story Wall Before Decorative Painting

After probing further, it turns out that our client had a pretty good idea of what she would like as mural elements: wetlands, cattails, tiger lilies, a blue heron and silhouette of trees in the foreground. Following our meeting, we both went online and searched for images to give more definition to her vision for the mural – we did find many images. The more challenging elements were the silhouettes the client had envisioned. One of the images made the concept clear: In nature, when a larger object is in the foreground, it is sometimes deprived of light and appears as a darker, single color, like a silhouette. Having grasped that concept, we proceeded to develop a watercolor rendering for the mural. Our client loved it and kept it on her computer until we were able to schedule her project!

Decorative finishing and murals in particular are powerful tools to help transform the mood of a space. Our client happened to come home as we were pulling up the tarps. When she got choked up while talking about her mural, we knew we had “hit the spot” for her.

How Often do you Want to Repaint a Victorian Multicolor House?

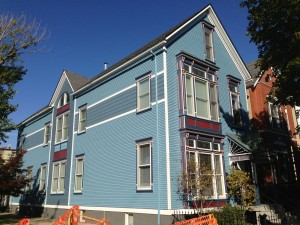
We just repainted a Victorian house, Circa 1885, for a new client in Chicago. When you see a house of this size and this level of detail, a question comes to mind: How often do you want to have to repaint a house like this? The answer is simple: The least often possible! The related question is: What can you do to extend the life of a paint job?

Chicago Victorian House Circa 1885

Depending on its size, its level of detail and the condition of its coatings and substrates, a Painted Lady’s paint job can cost between $20,000 and $50,000, sometimes even more. Because of its clapboard and extensive trim and millwork, a Victorian house is especially vulnerable to deterioration. Before having us start the painting project, the owners spent about $8,000 on carpentry repair work to the house. To minimize the future cost of carpentry repairs and prolong the longevity of the paint job, we recommend what we call “Maintenance Painting” to our clients. What does maintenance painting entail?

Maintenance painting consists of doing a close inspection of the coatings of a house, every couple of years. What do we look for: signs of failure in the caulking and coatings. When the coating or caulking starts to crack, it is an entry point to moisture, which gets trapped, rots the wood and causes paint failure. Once caulk starts to fail, the deterioration of the substrate and coatings accelerates rapidly. This is why early detection is critical to maintain the integrity of the paint job. We then do caulk and coating maintenance on those spots we detected. When we notice the beginning signs of wood rot, we also do epoxy restoration in those areas.

A homeowner needs the assistance of a dedicated painting and decorating contractor in order execute this periodic maintenance. The challenge is two-fold. One, owners are typically unaware of the importance of coating maintenance. Two, painting contractors do not seem to recognize the opportunity of offering this service to their clients. So, these expensive paint jobs are allowed to deteriorate, which adds to the future cost of the repaints.

The kind of coating maintenance we are talking about can cost between $500 and $1,500 every two years. The money saved in avoiding expensive carpentry repairs alone more than justifies coating maintenance. Our clients who own historic Victorian home or other “Period” homes in the Chicago area really appreciate this additional service we offer them.