Painting in Partnership listens to our ideas and needs and blends them with their skills to come up with a very unique and satisfying result each and every time.
- A. & C. Yeshwant, MD, South Barrington
Phone: (847)934-8885 | Email: info@paintpartner.com Visit PIP's Facebook Page View Mario Guertin's LinkedIn Profile Visit PaintPartner's Google+ Page Follow PaintPartner on Twitter Visit PIP's Pinterest Page Visit PIP's Houzz Page Subscribe to PaintPartner's RSS Feed

Archive for Plaster Restoration

Watch Out for Extreme Cold Temperatures when Restoring Plaster

During the course of a recent plaster restoration project, we ran into an unusual weather event in Chicago: two or three days of minus 15-degree temperatures! In a well-heated house, one might reasonably assume that it is safe to work on its interior surfaces. However, a recent experience has shown us otherwise.

Old houses were designed to “breathe”, allowing moisture to escape the house through its plaster walls. Moisture barriers and insulation had not come of age yet. As a consequence, the inside surfaces of the exterior walls can be very cold to the touch, in spite of very warm interior temperatures – check it out! During extreme cold temperatures like what we experienced last week in Chicago, these walls can actually be ice-cold! Much to our chagrin, we also discovered that such cold walls can seriously interfere with the plaster restoration work we do as painting and decorating contractors.

What we discovered is that the walls can be cold enough to cause the moisture in the patching materials to form small ice crystals and prevent those materials from dying and curing properly. Those materials normally generate their own heat, which helps the drying and curing process. The cold walls interfere with that process. Even though the surface of the patching material can appear and feel normal, it is not the case. Unfortunately, using a waterborne primer to prime over the patches can compound the problem by introducing additional moisture into the patches and the walls. The net result of this chain of events is that the primer does not properly adhere to the patches.

Failed Liner Paper Seams

How did we discover this problem, you might ask? One of the rooms in which we were doing plaster restoration was being prepped for an expensive wallpaper installation. Because the walls were plaster and the paper of such quality, we specified that a colored liner be first installed. That was our lucky break since it allowed us to discover our problem BEFORE installing the Burrows paper: the liner paper failed within hours from installing it!

What happened here? As the paper dries, it shrinks a little bit and put strong pressure at the seams. If the primer has not bonded well to the substrate (like in our case), the shrinking paper will cause the primer to delaminate and the paper to come apart at the seams. Lessons learned: Do not patch plaster walls when outside temperatures fall below 20 degrees and use oil primer (sorry for the smells and VOCs) to seal the plaster to help keep the moisture from penetrating into the walls.

As craftsmen, we are on a never-ending quest to learn as much as we can from any situation we encounter and pass on that knowledge to all our clients and people like you, our blog readers.

Repairing Cracks on Old Plaster Walls and Ceilings

Because of our love of old buildings and our desire to preserve them, our painting and decorating company is called on to restore old plaster, especially in Chicago’s old neighborhoods and the North Shore.

Stabilized Plaster Cracks – 1

Cracks in plaster deter many house painting contractors from even submitting a bid for the project. The reason is first that plaster restoration requires specialized knowledge, materials and techniques. Second, plaster restoration is also difficult to estimate, because the scope of the repairs is not entirely known until you start doing the work.

The clients who hire us to restore their old plaster value the many qualities of lath plaster. They are usually not interested in having it look like smooth drywall. They like it unevenness, the imperfections and signs of aging that plaster develops over time. It is part of the “cachet” of an old house to them.

Stabilized Plaster Cracks – 2

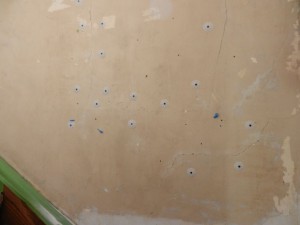
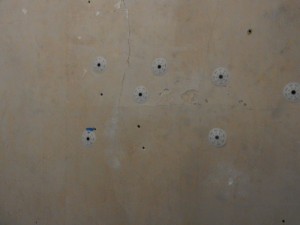
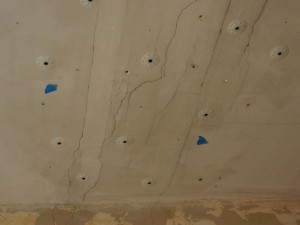
Our clients are however very interested in preserving the integrity of their plaster surfaces. Properly repairing cracks is especially important. When cracks develop on plaster surfaces, it means that some of the keys that attach the plaster to the lath have broken off. This allows the plaster to pull away from the lath and crack off. To deal with this problem, we use a system called “ Big Wally’s Plaster Magic ”. The process consists of drilling holes in the plaster to reach the lath (without drilling through the lath), injecting a liquid conditioner in those holes, then injecting an adhesive in the same holes so it can get between the plaster and the lath. The final step consists of using screws and over-size plastic plaster buttons to reattach the plaster to the lath. The next day, the screws and buttons can be removed and cracks can be repaired in the normal fashion.

Stabilized Plaster Cracks- 3

Depending on the condition of the surfaces, an average size room can take between 16 and 32 hours to perform the plaster restoration. When completed, the surfaces are stable again and they look beautiful. Plaster restoration is not cheap, but the result is well worth the effort.

Repairing Plaster in a One-Hundred-Year-Old Farmhouse

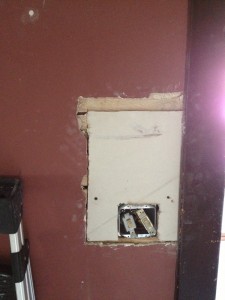
Repairing Holes in Old Plaster – A


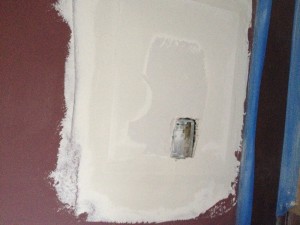
Repairing Holes in Old Plaster – B


One of our clients owns a farmhouse that was originally owned by one of the Busse family members, the original settler family of Mount Prospect in the Northwest suburbs of Chicago, who came to the area from Germany on the mid-nineteenth century. Today, the family tree has grown to over 2,200 people!
Being a farmhouse, its bones were more humble. For instance, the plaster was a mere one quarter to three eights of an inch thick. Over time, the plaster became quite fragile, especially on the ceilings, where the plaster keys simply gave way. The owner had that problem remedied e few years ago by covering the ceilings with quarter-inch drywall.

Over the years, the owner did a number of things to modernize, preserve and restore the house, especially on the outside. This year, she turned her attention to the interior of the house. High on her list was to bring the electrical

wiring up to code. The electrician doing that work turned out to be reciprocating-saw-happy! In three rooms, he made a total of twenty four good-size holes in the walls and ceilings, cutting through the lath and plaster from stud to stud.

Our painting and decorating company was first tasked with repairing all the holes created by the electrician and then, in a second phase, develop a “period” color scheme for those rooms. The fragility of the old plaster and the nature of the holes made our repair work especially challenging. In order to respect the client’s cost constraints, we decided to use drywall pieces of varying thicknesses to cover the holes. We first had to install wood braces to the old lath and studs, so we could secure the drywall pieces. We then applied two tight coats of setting joint compound, followed by two or three coats of lightweight joint compound. The end result was smooth as baby’s skin!

Working on older or historic properties and helping their owners in preserve their piece of history is what we love to do.

Chicago House Painting Project Brings Life to a Home: Part 2 – Plaster Restoration

At the outset of their interior painting project, the owners of this 1927 vintage Four-Square House made it clear that they liked the blemishes of their lime-based plaster walls and ceilings, as well as the worn out paint edges of the wood casings and trim elements. They felt that these imperfections gave character to their vintage house.

When estimating the cost of a house painting project, it is always important to properly assess, on the one hand, the level of surface preparation that a client is looking for. On the other hand, it is equally important to assess the repair that surfaces actually require, whether the owners realize it or not. This is where clear communication with the owners is critical in order to ensure that painters and owners are on the same page with what needs to be done. Taking the time to explain the purpose and process of plaster repairs goes a long way in gaining the client’s support for the plaster restoration needed prior to the house painting portion of the work.

Historic three-coat plaster is extremely strong and durable. It is fire resistant, mildew resistant and allows the walls to breathe. Replacing plaster is expensive. Therefore, it is worth making every effort to do plaster restoration wherever possible. By so doing, you preserve a piece of history and the authentic feel of your house!

Plaster Consolidation and Repair

Plaster Consolidation and Repair

Plaster being mounted over wooden lath, it has a tendency to crack, over time, when the lath is exposed to moisture. Movement in the building also causes plaster keys to break off from the lath and cause cracks or failure in the plaster. A number of methods can be used to address these issues.

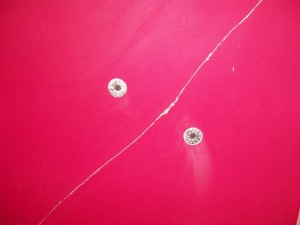
The picture in this article shows a crack that was stabilized by the use of two plaster buttons and wood screws. The screws re-fasten the plaster to the wood lath. Depending on the size of the crack, fiberglass tape can be placed over the crack prior to the patching process.