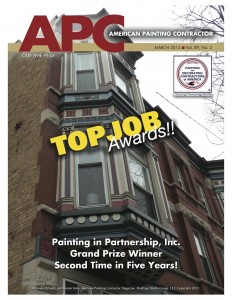
The historical restoration of the painted metal bay windows and cornice of this 1889 Chicago commercial building required an exceptional level of craftsmanship, to ensure a successful outcome. That craftsmanship was recently acknowledged by winning the Grand Prize of the Top Job Awards, a national painting competition organized by the American Painting Contractor magazine. Additionally, the project won the Commercial Exterior Restoration Award from the Painting and Decorating Contractors of America. Let’s look at the meaning of craftsmanship and what it involved on such a painting project.
I view craftsmanship as:
– The COMMITMENT to do the right thing
– The KNOWLEDGE to take the right action
– The SKILL to execute impeccably
In the case of this forty-foot high, old Chicago condominium building, overlooking a busy city sidewalk, with overhead power lines and next to an alley, what did craftsmanship entail?
Historical Color Scheme: Developing a historical color palette and a color placement concept that met the approval of the ten owners.
Gaining Access: Planning for the rentals and City permits for a 50 foot canopy, four layers of scaffolding and boom. Making arrangements with the City to move the power lines, and wrap the communication wire.
Meeting EPA’s RRP Rules: Building 3-stage dust containment barriers on scaffolding, sealing the windows and using special respirators and coveralls.
Meeting OSHA and City Regulations: Wearing fall-arrest harnesses and hard hats at all times. Tying off ladder to scaffolding. Providing night lighting for canopy. Closing sidewalk for two days and creating a street barricade for pedestrians.
Restoration of Surfaces: Rusty steel, corroded galvanized steel, extensive coating failure, rotted original window casings, missing decorative ornamentation. Rust converters and large amounts of epoxy were used on the metal surfaces. Custom millwork and plaster recreations of the missing ornamentations were produced for the project.
Painting: High-solid alkyd, direct-to-metal primer was used on all metal surfaces. High-solid waterborne exterior paints were used. To promote painting efficiency, we numbered the paint cans for the six different colors, along with all the color breaks for the complex array of painted surfaces, located over 5 levels of scaffolding. It was a little bit like “painting by the number”!
When paint restoration is executed with this level of detail, it not only produces great short-term results, but also saves money in the long-run. Craftsmanship creates value for the owners and the community where the building is located!


 Follow


